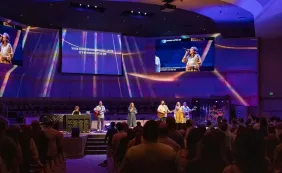
If you have ever watched your church live stream back and noticed the pastor's voice sounds distant, buried under room reverb, or drowned out by congregational noise, you are not alone. Most churches start streaming by simply pointing a camera at the pulpit and hoping the built-in microphones capture something usable. The result is rarely pleasant: a muddy mix where the online audience strains to hear the message while the physical congregation enjoys perfectly clear sound through the PA system.
This guide walks you through two proven approaches for integrating wireless microphones with the NearStream VM33 camera. Whether you are running a simple two-mic setup or feeding audio from a full mixer board, you will learn the exact wiring, app settings, and troubleshooting steps needed to deliver clear sound to both your in-room congregation and your online viewers.

Understanding the Dual-World Audio Challenge
The fundamental challenge of church streaming is that your camera and your PA system are trying to do different jobs. Your PA speakers project sound outward into a reverberant space. Your camera's microphones pick up everything in that space: the pastor's voice bouncing off walls, the rustling of bulletins, the air conditioning hum, and the natural echo live environments create. When that mixed audio goes straight to Facebook Live or YouTube, your online audience hears a thin, distant version of what sounds rich and present in the room.
The solution is to separate your broadcast audio from your room audio. Instead of letting the camera microphones capture the room, you feed a direct audio signal into the VM33 from a wireless microphone or mixer. This gives your stream a clean, isolated voice track. Meanwhile, your existing church audio setup, your PA speakers, amplifiers, and floor monitors, continues doing exactly what it was designed to do: serve the people physically present.
Think of it as two parallel audio paths. Path one goes from microphone to PA system to congregation ears. Path two goes from microphone to VM33 to internet to remote viewers. The two paths share the same source but never interfere with each other. Getting this right is what transforms a stream from "we can barely hear him" to "it sounds like we are sitting in the front row."
What You Will Need
Before choosing your setup path, gather the following equipment. Not every item is required for both approaches, so read through the two paths below to see what applies to your situation.
Essential for all setups:
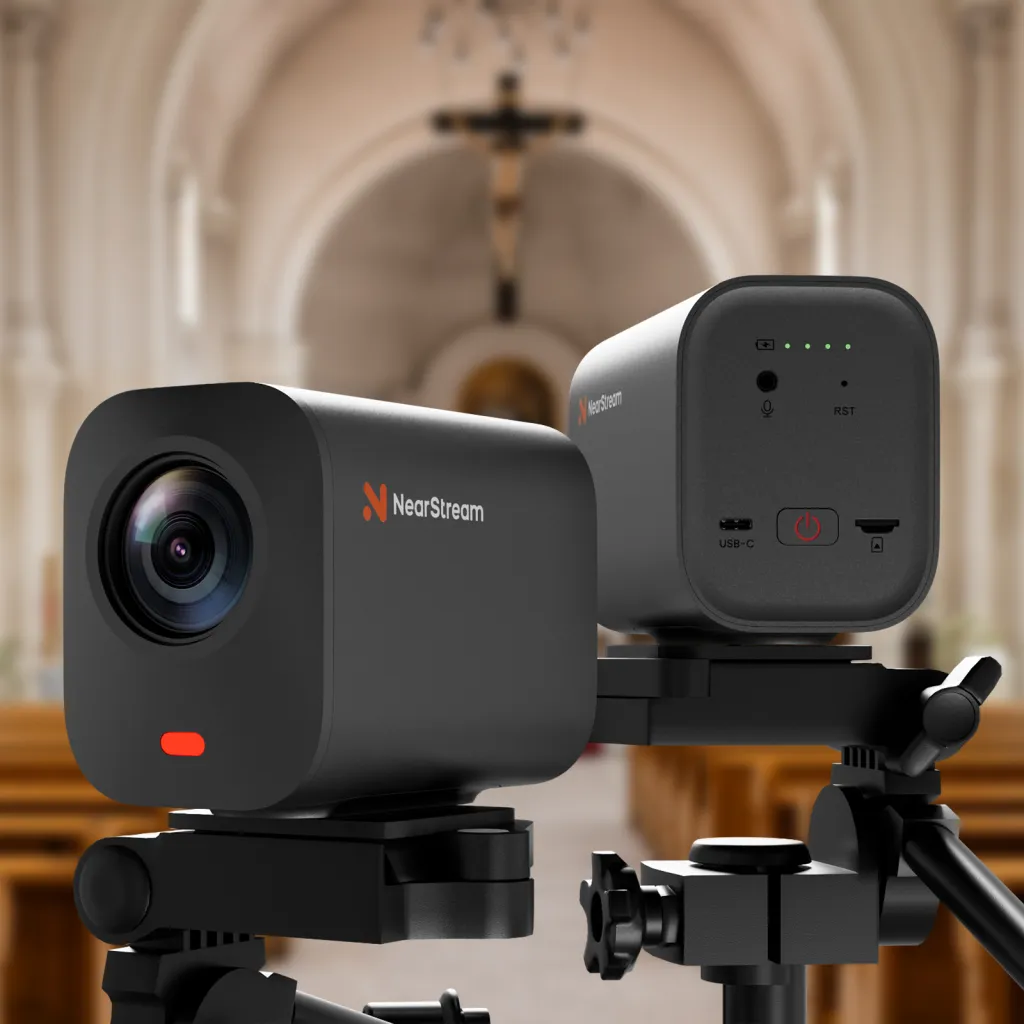
- NearStream VM33 camera with power and network connection
- Smartphone or tablet with the NearStream app installed
- One or more wireless microphones with a receiver unit (such as the AWM25T). If you are still deciding between different types of audio hardware, our microphone buying guide covers the differences between USB, XLR, and condenser mics for various environments.
- At least one 3.5mm TRS audio cable (3-pole, not 4-pole TRRS)
- Your existing PA system or powered speakers for in-room sound
Required only for the Mixer Feed path:
- An audio mixer or digital console with at least one auxiliary output
- Additional balanced or unbalanced cables to run from mixer aux send to VM33
- Basic understanding of your mixer's routing (aux sends, main mix, channel assignments)
Worth considering:
- Headphones for monitoring your stream audio before going live
- A second TRS cable as a backup
- A small DI box if your mixer outputs at line level and you need impedance matching

TRS vs TRRS: The Cable Connection That Makes or Breaks Your Stream
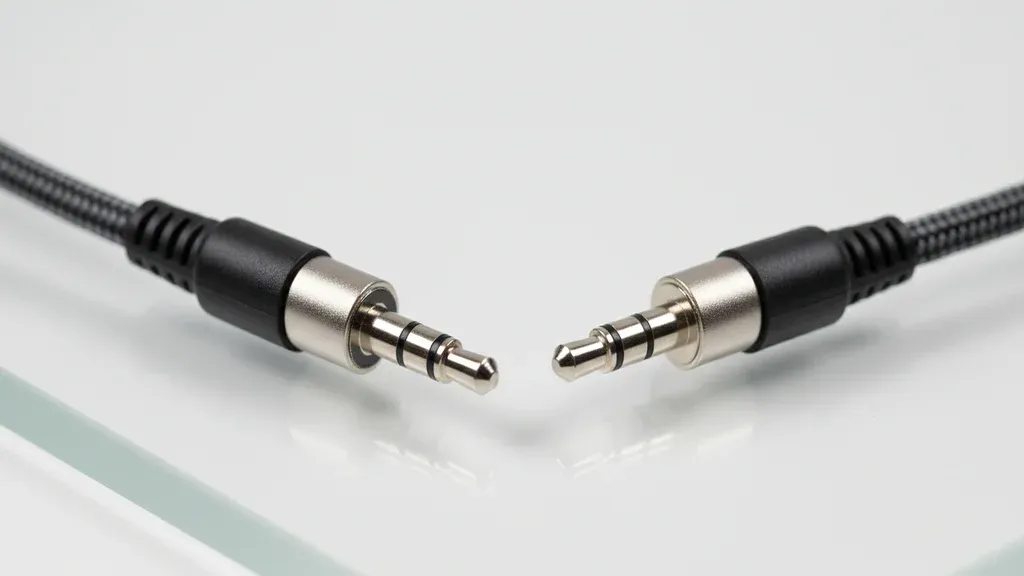
Here is the single most common reason church streamers get no audio into their VM33: they are using the wrong cable. It is an easy mistake to make because both connectors look nearly identical at a glance. But using a TRRS cable instead of a TRS cable will cause frustration, hours of troubleshooting, and possibly a Sunday morning panic.
A TRS (Tip-Ring-Sleeve) connector has three black insulating bands on the metal shaft. It carries a left audio channel, a right audio channel, and a ground connection. This is what the VM33 expects for its external audio input. A TRRS (Tip-Ring-Ring-Sleeve) connector has four black insulating bands. It adds a microphone input channel, which is designed for smartphone headsets that combine headphones and a microphone in one plug.
The VM33's audio input port is configured for standard line-level stereo input via TRS. When you plug a TRRS cable into it, the contact points misalign. The camera may not detect any audio at all, or it may only receive audio on one channel, or you may get garbled, noisy output. The fix is simple: use a standard 3.5mm TRS cable. If you are unsure which cable you have, count the black bands. Three bands means TRS. Four bands means TRRS. Only the three-band cable will work.
When shopping for cables, look for descriptions that say "3.5mm stereo audio cable" or "TRS patch cable." Avoid anything labeled "headset cable," "mic/headphone combo," or "TRRS." Keep a spare TRS cable in your AV booth. They are inexpensive and having a backup will save you if your primary cable fails on a Sunday morning.
Setup Option 1: The Independent Dual-Mic Setup
This is the approach most small to mid-sized churches should start with. It is simple, requires no mixer knowledge, and gets you professional-sounding stream audio in minutes. The core idea is that your wireless microphone receiver feeds audio directly into the VM33, while your PA system handles room amplification through its own completely separate microphone.
In this setup, the pastor wears a wireless lavalier microphone connected to your AWM25T or similar wireless system. The receiver output connects to the VM33 via a TRS cable plugged into the camera's audio input port. The PA system uses a separate microphone at the pulpit or a second wireless system to amplify the pastor's voice in the room. The two systems operate independently.
Step-by-step wiring:
- Place your wireless receiver near the VM33 camera, within easy cable reach.
- Connect the receiver's line output to the VM33 audio input using a 3.5mm TRS cable.
- Ensure the PA system microphone is positioned normally for room amplification.
- Power on both the VM33 and the wireless receiver.
- Open the NearStream app on your phone or tablet.
This setup works because the VM33 receives a direct, line-level audio signal from the wireless receiver. There is no room echo, no audience noise, and no feedback loop. The online audience hears exactly what the microphone picks up: a clean, close-miked voice track. Meanwhile, the PA system does its job for the in-room congregation without any interaction with the stream.
The limitation of this approach is that you cannot easily mix multiple microphones into the stream. If you have a worship leader, a pastor, and a guest speaker, each would need their own wireless receiver feeding into the VM33, or you would need to physically swap cables between speakers. For churches with one primary speaker per service, this is rarely a problem. For more complex services, the Mixer Feed setup below is the better choice. Many of these organizational principles for volunteer-run broadcasts are also explored in our high school sports live streaming guide, which can help you build a repeatable system for any event.
Setup Option 2: The Mixer Feed Setup
If your church already has an audio mixer or digital console, this approach unlocks professional-level control over your stream audio. Instead of connecting a wireless receiver directly to the VM33, you send a dedicated audio mix from your mixer to the camera. This lets you blend multiple microphones, add compression and EQ, and create a broadcast mix that is optimized for online listening.
The wiring is straightforward but requires understanding your mixer's auxiliary bus system. Most mixers have one or more "aux" outputs that can be configured to carry a separate mix from the main house speakers. You assign each microphone channel to the main mix (for the PA system) and also to an aux send (for the stream). This gives you independent level control. You can turn up the pastor's microphone in the stream mix while keeping it at a normal level in the room mix, or fade down music in the broadcast while keeping it loud in the sanctuary.
Step-by-step wiring:
- Identify an available aux output on your mixer. Aux 1 or Aux 2 are commonly used.
- Connect the aux output to the VM33 audio input using a TRS cable. Depending on your mixer, you may need a 1/4-inch to 3.5mm adapter or a DI box.
- On each microphone channel, turn up the aux send knob to route that microphone into the stream mix.
- Leave the main faders at their normal positions for the PA system.
- Use the master aux output level to set the overall volume feeding the VM33.
The advantage of this approach is flexibility. You can include the worship team's microphones in the stream mix, add a room microphone to capture congregational singing, and apply EQ to compensate for the fact that online listeners are using earbuds rather than full-range PA speakers. If your mixer has a digital output or USB audio interface, you can even send the aux mix directly to a computer for more advanced processing before it reaches the VM33.

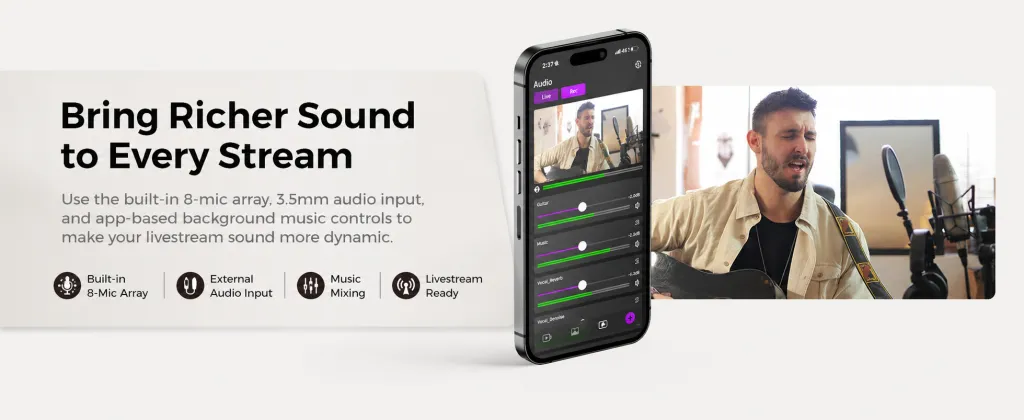
Configuring the NearStream App for Broadcast-Quality Audio
Once your physical cables are connected, the final critical step is telling the VM33 which audio source to use for the stream. By default, the camera uses its internal microphones. If you have connected an external wireless microphone or mixer feed but have not changed the app settings, your stream will still pull audio from the camera's built-in mics, and all your careful wiring will be ignored.
Muting internal microphones:
- Open the NearStream app and connect to your VM33.
- Navigate to the audio settings panel.
- Locate the microphone input selection. You should see options for "Internal" and "External" or "Line In."
- Select the external audio input.
- Mute or disable the internal microphones completely.
This step is what eliminates room echo from your broadcast. When the internal mics are active, they capture the entire sanctuary: the pastor's voice through the PA speakers, the natural reverb of the room, the rustling of papers, and the coughing and whispering of the congregation. By switching to the external input and muting the internal mics, you ensure that only the direct, clean audio from your wireless microphone or mixer makes it to the stream.
Setting levels: After selecting the external input, do a quick sound check. Have your pastor speak at a normal sermon volume while you monitor the audio meters in the NearStream app. The levels should peak around -12 dB to -6 dB. If the meters are hitting the red zone (0 dB), lower the output level on your wireless receiver or the master aux send on your mixer. If the levels are too low, increase the output accordingly. Clipped, distorted audio is worse than slightly quiet audio, so err on the side of conservative levels.
Troubleshooting Common Church Audio Problems
Even with the right cables and settings, you may encounter issues. Here is how to diagnose and fix the most common problems.
No audio on the stream at all: Check three things in order. First, confirm you are using a TRS cable, not TRRS. Second, verify the wireless receiver is powered on and the microphone is paired. Third, confirm the NearStream app is set to external audio input and internal mics are muted.
Audio only on one side (left or right): This usually means your TRS cable is not fully seated in the VM33 input, or the cable itself has a broken conductor. Try reseating the cable or swapping in a known-good spare.
Echo or doubling effect: If your stream sounds like it has a slight echo, the VM33 internal microphones are probably still active and mixing with your external audio. Return to the app and verify that internal mics are fully muted, not just turned down.
Distorted or clipping audio: The signal from your wireless receiver or mixer is too hot (too loud) for the VM33 input. Lower the output level on the source device. The VM33 expects line-level input, so if you are sending a microphone-level signal without proper gain staging, distortion will occur.
Hum or buzz in the stream: This is usually a ground loop caused by connecting devices that are plugged into different electrical circuits. Try plugging the VM33 and your wireless receiver into the same power strip or outlet. If the hum persists, a ground loop isolator between the receiver and the VM33 will eliminate it.
Frequently Asked Questions
Can I use the same wireless microphone for both the PA system and the VM33?
Not directly. A single wireless receiver has one output. If you split that output to feed both your PA system and the VM33, you will likely create impedance problems and possible feedback loops. The recommended approach is either the Independent Dual-Mic setup (separate mics for room and stream) or the Mixer Feed setup (all mics go into the mixer, which splits the signal properly via aux sends).
Do I need a special license to use wireless microphones in my church?
In the United States, wireless microphones operate in specific frequency ranges regulated by the FCC. Most modern wireless systems, including the AWM25T, operate in license-free bands (typically 2.4 GHz or specific UHF bands). If you are using professional UHF wireless systems, check that your frequencies are not in a band that has been reassigned for other uses. For most small church systems, this is not a concern.
How do I handle music and worship teams in the stream mix?
If you are using the Mixer Feed setup, simply assign the worship team's microphone channels to the same aux bus feeding the VM33. You can create a balanced mix that includes vocals and instruments. If you are using the Independent Dual-Mic setup, you will need to position your wireless microphone to pick up the worship team, or consider upgrading to the mixer-based approach for services with full bands.
Will this setup work with Facebook Live, YouTube Live, and other platforms?
Yes. The VM33 sends one unified audio and video stream to the NearStream platform, which then distributes to your chosen destinations. The audio routing happens entirely within the VM33 and the NearStream app before the stream ever reaches the internet. Any platform you stream to will receive the same clean audio.
Bringing It All Together
Building a church audio system that serves both your in-person congregation and your online community does not require professional audio engineers or expensive equipment. It requires understanding one concept: your stream audio and your room audio are two different jobs that need two different solutions. The VM33 makes this possible by accepting clean external audio through a simple TRS connection while the NearStream app gives you the controls to route that audio properly.
Start with the basics. Check your cable. Make sure it is TRS, not TRRS. Connect your wireless receiver to the VM33, or run an aux feed from your mixer. Open the app, mute the internal microphones, and confirm your levels. Do a ten-minute sound check before your first service. These small steps, done correctly, will transform your stream from an echo-filled afterthought into a clear, professional broadcast that brings your message to everyone watching, whether they are in the front pew or five hundred miles away.
If you are ready to upgrade your streaming setup, the NearStream VM33 provides the audio input flexibility, app control, and video quality that church streamers need. Combine it with a reliable wireless microphone system and the dual-world strategy outlined here, and you will have a streaming church audio setup that sounds as good as it looks. To take your broadcast even further, you can improve live stream video quality by fine-tuning your lighting and lens positioning to match your new professional sound.