


Whether you're a budding podcaster, a gamer capturing epic moments, a student recording online lectures, or a musician sampling sounds from the web, knowing how to record desktop audio is an essential skill. For years, Audacity has been the go-to tool for this task—a powerful, open-source, and free audio editor that rivals many paid applications.
But as operating systems evolve, the methods for capturing your computer's internal sound have changed. What worked on Windows 7 or an old Intel Mac might not work on the latest hardware. This is where the confusion often begins.
You've come to the right place. This guide is your definitive 2025 resource, updated with the latest techniques and troubleshooting tips for Audacity on both Windows 11 and modern macOS. We'll cut through the noise and give you the most reliable, high-quality methods to record your computer's audio flawlessly.
As of 2025, Audacity is more powerful than ever. With recent versions introducing real-time effects, cloud integration via Audio.com, and even experimental AI-powered OpenVINO plugins for noise suppression and transcription, it has solidified its place among the best free audio editors available.1 Let's harness that power and get you recording.
Quick-Start Guide: Audacity Desktop Audio Settings for 2025
For those who are already familiar with Audacity and just need a quick reminder of the correct settings, this table has you covered. These are the modern, recommended configurations for a clean, digital audio capture.
| Operating System | Recommended Method | Required Software/Driver | Audacity Host Setting | Audacity Recording Device |
|---|---|---|---|---|
| Windows 11 / 10 | Digital Loopback | None (Built-in) | $Windows WASAPI$ | Speakers (loopback) or Headphones (loopback) |
| macOS (Ventura & newer) | Virtual Audio Driver | BlackHole (Free) | $Core Audio$ | BlackHole 2ch |
If these settings don't immediately make sense, don't worry. The following sections will walk you through every step in detail for your specific operating system.

How to Record Desktop Audio with Audacity on Windows 11 & 10
For Windows users, the process of recording system audio has become remarkably simple and high-quality, thanks to a technology called Windows Audio Session API (WASAPI). This method allows Audacity to capture the exact digital audio stream your computer is sending to your speakers or headphones, resulting in a perfect, lossless recording.4 It's far superior to older, analog-style methods like "Stereo Mix," which are often disabled on modern PCs anyway.4
Step 1: Configure Audacity for WASAPI Loopback
First, ensure you have the latest version of Audacity installed from the official website.6 Once open, the setup takes less than a minute.
- Select the Audio Host: In Audacity's main window, locate the Audio Setup toolbar. Click on it, hover over Host, and select $Windows WASAPI$ from the list. This is the key to enabling direct digital recording.4
- Select the Recording Device: Now, go back to the Audio Setup toolbar and look at the Recording Device option. This is the most important part. You need to select the loopback version of the device you are listening through.
- If you're listening through your speakers, it will be named something like Speakers (Realtek High Definition Audio) (loopback).
- If you're using headphones, it might be Headphones (2- High Definition Audio Device) (loopback).
The specific name will vary based on your sound card, but the crucial part is to choose the output device that has (loopback) at the end.7 This tells Audacity to "listen" to what's being sent to that device.
- Select Recording Channels: For most purposes, leave the recording channels set to Stereo.
Your audio setup should now look something like this:
- Host: $Windows WASAPI$
- Playback Device: Your regular speakers or headphones.
- Recording Device: Your speakers or headphones with (loopback).
- Recording Channels: Stereo

Step 2: Critical Pre-Recording Checks
Before you hit the record button, two small but critical checks will save you from common headaches.
- Disable Software Playthrough: This is the number one cause of echoes and distorted recordings. Go to the menu bar and click Transport > Transport Options. Ensure that Enable audible input monitoring is unchecked. If it's checked, Audacity will try to play the audio it's recording back to you through your speakers, creating a horrible feedback loop.4
- Silence System Notifications: Windows loves to make noise—email alerts, notifications, and other system sounds. WASAPI will record all of it. To ensure a clean recording, temporarily disable your system sounds. You can do this by right-clicking the speaker icon in your taskbar, opening the Volume Mixer, and muting System Sounds.6

Step 3: Make Your Recording
With everything configured, you're ready to record.
- Start Your Audio Source: Begin playing the video, music, game, or any other audio on your computer that you wish to capture. Important: With WASAPI, an audio stream must already be active for Audacity to detect and record it. If you press record in total silence, the recording may pause or not start at all.7
- Press Record in Audacity: Click the red Record button (●) in Audacity's transport toolbar. You should immediately see the waveform being drawn in the track as the audio is captured.
- Monitor Your Levels: Watch the recording meter at the top of the screen. For a healthy signal that isn't distorted (or "clipping"), aim for the peaks to bounce around −6 dB. If the bars are consistently hitting 0 dB and turning red, the source audio is too loud.
- Stop and Save: Once you've captured what you need, click the black Stop button (■). You can now edit your audio. To save your work, go to File > Export Audio and choose your desired format, like MP3 or WAV.5

Audacity: How to Record Desktop Audio on macOS
Recording desktop audio on a Mac is a different beast altogether. For security and privacy reasons, macOS does not provide a built-in way for applications to directly capture the system's sound output.9 To accomplish this, you need to create a "virtual audio cable" that can route the audio from your system's output to an input that Audacity can listen to.
For years, the go-to tool was Soundflower, but it is now outdated and not compatible with modern Apple Silicon (M1/M2/M3/M4) Macs.7 The new gold standard is a free, open-source, and powerful driver called
BlackHole. This guide will walk you through the definitive BlackHole method, which works flawlessly on both Intel and Apple Silicon Macs running the latest versions of macOS.12
Part 1: Download and Install BlackHole
BlackHole is a virtual audio driver that creates an invisible bridge between applications.14
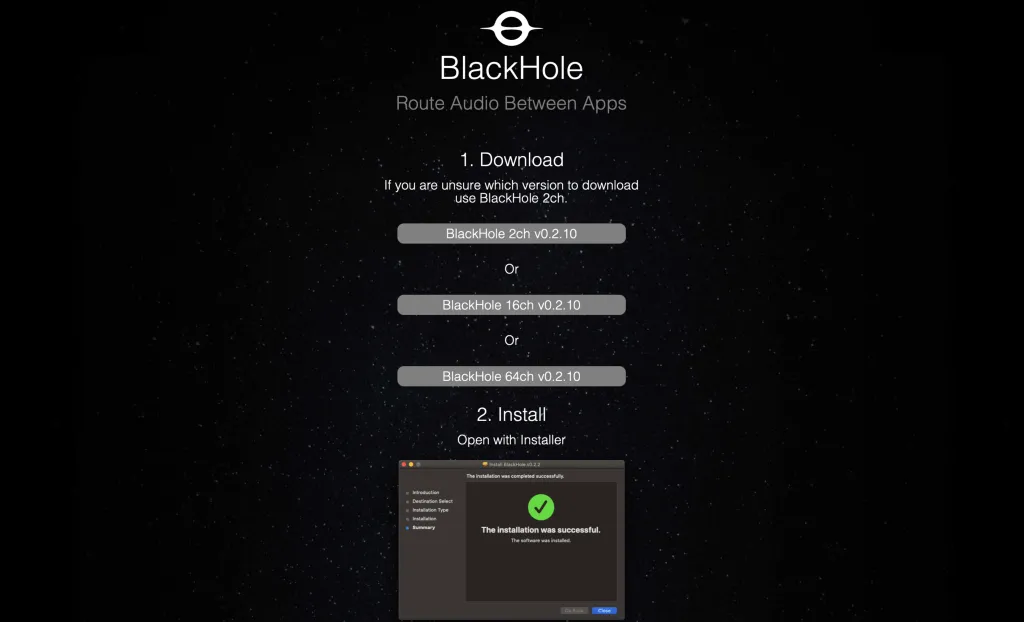
- Download BlackHole: Go to the official Existential Audio website to download BlackHole. You will be asked to enter your email and name, and a download link will be sent to you.12 This is to keep you updated and prevent abuse.
- Choose Your Version: You will likely see options for 2ch, 16ch, and 64ch (channel) versions. For recording desktop audio, the 2ch (stereo) version is all you need.
- Install the Driver: Open the downloaded .pkg file and follow the installation prompts. The process is straightforward, but it may require you to restart your computer to finalize the installation.15
Part 2: The Most Critical Step—Create a Multi-Output Device
This is where most people get stuck, and it's the key to making everything work. You need to tell your Mac to send its audio to two places simultaneously:
- Your actual speakers or headphones (so you can hear the audio).
- The virtual BlackHole device (so Audacity can record it).
You achieve this by creating a "Multi-Output Device."
- Open Audio MIDI Setup: Go to Applications > Utilities and open the Audio MIDI Setup app.12
- Create the Device: In the bottom-left corner of the window, click the + button and select Create Multi-Output Device.17
- Configure the Device: A new device will appear in the list. Select it. On the right side of the window, you will see a list of all your audio devices. You must check the boxes for:
- Your primary output device (e.g., MacBook Pro Speakers or your external headphones).
- BlackHole 2ch.
- Set Your System Output: This is the step that solves 99% of problems. You must now set this new virtual device as your Mac's main sound output. Go to System Settings > Sound. Under the Output tab, select the Multi-Output Device you just created.12 You will now be able to hear your computer's audio and record it at the same time.
The reason this step is so crucial is that if you only select BlackHole as the input in Audacity but don't route your system's main audio to BlackHole, Audacity will be listening to an empty channel, resulting in a flat line recording—a very common point of frustration.11

Part 3: Configure Audacity and Start Recording
Now that your Mac is correctly routing its audio, the final step is to configure Audacity.
- Open Audacity: If Audacity was already open, you may need to restart it or go to Transport > Rescan Audio Devices for it to see BlackHole.
- Set the Recording Device: In the Audio Setup toolbar, set the Recording Device to BlackHole 2ch.12
- Set the Playback Device: It's good practice to set the Playback Device to your actual hardware (e.g., MacBook Pro Speakers), not the Multi-Output Device. This ensures that when you play audio back from within Audacity's timeline, it behaves as expected.
- Disable Software Playthrough: Just like on Windows, go to Transport > Transport Options and make sure Enable audible input monitoring is unchecked to prevent echoes.7
- Record: Start playing the audio you want to capture on your Mac, then click the red Record button in Audacity. You should see the waveform appear, confirming that you are successfully recording your desktop audio.
Advanced Techniques and Best Practices
Once you've mastered the basics, you can elevate your recordings with these advanced techniques.
Recording Your Microphone and Desktop Audio Simultaneously
This is a common requirement for creating tutorials, recording gameplay commentary, or conducting podcast interviews. The methods differ significantly between Windows and macOS.
On Windows
A simple workaround is to use a built-in Windows feature to "listen" to your microphone.
- Right-click the speaker icon in the taskbar and go to Sound settings.
- Scroll down to More sound settings to open the classic Sound control panel.
- Go to the Recording tab, select your active microphone, and click Properties.
- In the Listen tab, check the box for Listen to this device.
- Click Apply.
Your microphone's audio will now be routed through your main desktop audio. When you use the WASAPI loopback method in Audacity, it will capture both your desktop audio and your voice. Warning: This method can introduce a slight delay (latency) on your voice and may cause feedback if your speakers are too loud, so it's best used with headphones.18
On macOS
The macOS approach is more professional and flexible, using another feature of the Audio MIDI Setup utility.
- Open Audio MIDI Setup.
- Click the + button and select Create Aggregate Device.
- In the new Aggregate Device, check the boxes for both your microphone and BlackHole 2ch.19
- In Audacity, set this new Aggregate Device as your Recording Device. This will create a stereo track where one channel is your desktop audio (from BlackHole) and the other is your microphone. You can then split the stereo track to mono in Audacity to edit them independently.
Best Practices for High-Quality Recordings
- Set Your Levels Correctly: As mentioned, avoid "clipping" at all costs. Digital distortion is unfixable. Aim for your recording levels to peak around −6 dB in Audacity's meter to leave plenty of headroom.7
- Choose a Quiet Environment: Your microphone will pick up everything. Close doors and windows, and turn off fans or air conditioners to minimize background noise.6 For narration, consider finding out
what is the best microphone for audiobook narration to get a professional sound from the start. - Use a High-Quality Format: When you're done editing, export your master file as a WAV file for uncompressed quality. You can then create a compressed MP3 copy for sharing if needed.5 Learning how to properly export can dramatically
improve audio quality. - Post-Processing: A raw recording is just the beginning. After capturing your audio, the next logical step is to clean it up. Learning how to remove background noise in Audacity is a game-changing skill that can make your recordings sound polished and professional.
Troubleshooting Common Audacity Recording Problems (FAQ)
Even with the correct setup, things can sometimes go wrong. Here are solutions to the most common issues.
Q: I hit record, but the waveform is just a flat line. What's wrong?
- On Windows: The most likely cause is that no audio was playing on your computer when you started the recording. Remember, WASAPI loopback needs an active audio stream to capture.7 Start your audio source
first, then press record. - On macOS: This is almost always due to the Multi-Output Device not being set as your system's main audio output in System Settings > Sound. Double-check that setting, as it's the most critical part of the Mac setup.11
Q: My recording has a weird echo, robotic sound, or is distorted.
- This is the classic symptom of having Enable audible input monitoring (Software Playthrough) turned on. Go to Transport > Transport Options in the Audacity menu and make sure it is unchecked.4
Q: Audacity stopped recording audio after a Windows update.
- Windows updates can sometimes reset your default audio devices. The first thing to try is to go to Transport > Rescan Audio Devices in Audacity. If that doesn't work, revisit your Windows Sound settings to ensure your primary playback device is still correctly set, and then re-select the correct WASAPI loopback device in Audacity.21
Q: On Windows, I get an error or a flat line even when everything seems correct.
- There is a known, though uncommon, issue where Audacity's channel configuration can conflict with the WASAPI driver. A user-discovered fix that often works is to change the Recording Channels in Audacity from Stereo (2) to a higher number, like 8. This can sometimes force Audacity to find and lock onto the correct audio stream.21
Conclusion: You're Ready to Record
Capturing desktop audio doesn't have to be a frustrating experience. By leveraging the right modern tools—WASAPI on Windows and the BlackHole driver on macOS—you can achieve crystal-clear, reliable recordings directly within Audacity. The key is understanding how your operating system handles audio and configuring Audacity to match.
You are now equipped with the knowledge to not only record your system sound but also to troubleshoot common issues and even tackle advanced setups like recording your microphone and desktop audio together. Audacity remains an incredibly versatile and powerful tool for creators of all kinds. For those who require even more advanced features and integration with video editing suites, exploring a comparison of Audacity vs Adobe Audition might be a logical next step.22 But for the vast majority of audio recording and editing tasks, Audacity provides everything you need to bring your projects to life.
Now, go create something amazing.
- Audacity ® | Free Audio editor, recorder, music making and more! https://www.audacityteam.org/
- Audacity has Been Improving! Here's What's New - Krotos Studio https://krotos.studio/blog/audacity-improvements
- Audacity 3.7.4 Improves Effect Preview, Studio Fade Out, and Waveform Rendering https://9to5linux.com/audacity-3-7-4-improves-effect-preview-studio-fade-out-and-waveform-rendering
- Tutorial - Recording Computer Playback on Windows - Audacity Manual https://manual.audacityteam.org/man/tutorial_recording_computer_playback_on_windows.html
- The Complete Guide How to Record Audio on Windows 11 - MiniTool Video Converter https://videoconvert.minitool.com/news/how-to-record-audio-on-windows-11.html
- How to Use Audacity to Record Computer Audio - DemoCreator - Wondershare https://democreator.wondershare.com/audio-recorder/how-to-record-desktop-audio-with-audacity.html
- Recording desktop audio - Audacity Support https://support.audacityteam.org/basics/recording-desktop-audio
- Audacity - Tutorial for Beginners in 9 MINUTES ! [ FULL GUIDE 2025 ] - YouTube https://www.youtube.com/watch?v=C_mHOHv28Ic
- Tutorial - Recording Computer Playback on Mac - Audacity Manual https://manual.audacityteam.org/man/tutorial_recording_computer_playback_on_mac.html
- How to record internal audio on MacBook Air? - audacity - Reddit https://www.reddit.com/r/audacity/comments/1lddmkm/how_to_record_internal_audio_on_macbook_air/
- Recording computer sound on an M4 Macintosh - Audacity Forum https://forum.audacityteam.org/t/recording-computer-sound-on-an-m4-macintosh/134837
- Use Audacity to Record Computer Audio on Mac – A Quick Guide - DemoCreator https://democreator.wondershare.com/audio-recorder/audacity-record-computer-audio-mac.html
- 3 Free & Easy Methods to Record Internal Audio on Mac - AnyMP4 https://www.anymp4.com/recorder/record-internal-audio-on-mac.html
- BlackHole: Route Audio Between Apps - Existential Audio https://existential.audio/blackhole/
- Download BlackHole for Mac | MacUpdate https://blackhole.macupdate.com/
- How to Record Internal Audio on Mac? - Apple Support Communities https://discussions.apple.com/thread/255288667
- What's Best Screen Recorder for Mac with Internal Audio? - Apple Support Communities https://discussions.apple.com/thread/255228718
- How to use Audacity record computer audio and mic on Windows 11? Help! - Reddit https://www.reddit.com/r/screenrecorders/comments/1kbazpi/how_to_use_audacity_record_computer_audio_and_mic/
- Blackhole: Home https://www.blackhole.audio/
- How To Record Audio on Windows 11 - 3 Easy Ways - DemoCreator https://democreator.wondershare.com/audio-recorder/record-audio-windows-11.html
- Audacity no longer records PC audio - Windows https://forum.audacityteam.org/t/audacity-no-longer-records-pc-audio/130438
- What is the audio recorder for PC from both internal and external sources? https://techcommunity.microsoft.com/discussions/windows11/what-is-the-audio-recorder-for-pc-from-both-internal-and-external-sources/4431574


