Whether you are saving an incredible basketball highlight, extracting a product demo from a live commerce stream, or gathering reference material for your next video, knowing how to clip a YouTube video is an essential skill for any content creator.
However, there is a big difference between generating a quick 60-second sharing link and actually downloading a video segment as an MP4 file to your PC or smartphone.
In this comprehensive guide, we will show you exactly how to clip YouTube videos, how to save specific segments to your device, and how to bypass the native 60-second restriction.

What Does It Mean to "Clip" a YouTube Video?
"Clipping" a YouTube video refers to extracting a specific segment from a longer video—often 5 to 60 seconds—to share, download, or repost. It’s not the same as full video editing; instead, it’s like trimming the highlights. Many users clip moments for educational use, reaction content, social media reposts, or documentation. Creators often use this feature to boost engagement by showcasing key takeaways or entertaining excerpts.
YouTube offers a built-in clipping tool, but there are also third-party options—both free and paid—that allow more flexibility, such as downloading, exporting in MP4, or combining clips.
Why Clip a YouTube Video?
Content repurposing is king. Creators and marketers constantly pull snippets from long-form content to drive engagement. Common use cases include:
- Sports Highlights: Extracting a game-winning shot or a scoreboard update to share with team parents or fans.
- Live Commerce: Pulling specific product demonstrations from a 2-hour multi-cam studio stream to post on TikTok Shop or Amazon Live.
- Short-form Content: Repurposing podcasts or tutorials into YouTube Shorts or Instagram Reels.

YouTube Shorts vs YouTube Clips: What’s the Difference?
Although both involve short video formats, YouTube Shorts and YouTube Clips are entirely different in origin, intent, and technical structure:
Feature | YouTube Shorts | YouTube Clips |
Created By | Uploaded as standalone video | Created from existing videos |
Duration | Up to 60 seconds | 5–60 seconds |
Public Visibility | Shows up in Shorts feed | Only visible via shared URL |
Downloadable? | Yes (if your content) | No (hosted on YouTube) |
Monetizable? | Yes (ads revenue & Shorts Fund) | No direct monetization |
💡Shorts are similar to TikToks or Instagram Reels, designed for algorithmic discovery. Clips are for highlighting parts of longer content and sharing key moments.
How to Use YouTube’s Built-in Clip Tool
Using YouTube’s built-in clip tool is fast and intuitive. As of 2025, it works on both desktop and mobile (YouTube app only).
Steps on Desktop:
1. Go to the video you want to clip.
2. Under the video, click the “Clip” icon (scissors).
3. Choose the start and end times (5–60 seconds).
4. Add a title (optional) and click “Share Clip.”
5. You’ll get a unique URL for the clipped segment.

On Mobile App:
1. Tap “Share” → then tap “Create Clip.”
2. Adjust the slider to select the segment.
3. Share it directly via message or to social media.
📌Note: The built-in clip tool is fantastic for sharing a quick URL, but it restricts you to 60 seconds and does not let you save the video file. If you need to edit the footage, you'll need the methods below.
How to Clip and Download a YouTube Video in MP4 Format
To truly edit or repurpose a segment, you need to clip the YouTube video and download it directly to your device. This process involves using third-party software that can parse the YouTube URL, allow you to select a specific time range (bypassing the 60-second limit), and extract that exact snippet as an MP4. This is the preferred method for content creators and editors.
While YouTube itself doesn't let you download clips in MP4, third-party tools and browser-based software can bridge the gap. Here’s a full walkthrough using a browser tool like Kapwing or VEED.IO, suitable for beginners:
Step-by-Step (Browser Method):
Copy the YouTube Video URL
Go to the video you want to trim. Copy the full URL from your browser.
Paste URL into Trimming Tool
Open a site like Kapwing or VEED.IO and paste the URL.
Select Time Range
Use sliders or input fields to define the start and end time for your clip.
Add Optional Edits
Add text, captions, background music, or crop for TikTok/Instagram dimensions.
Export and Download as MP4
Choose the “Export as MP4” option. Wait for rendering, then download the final file.
📌 You can also select resolution (e.g., 720p, 1080p) and aspect ratio before exporting.
📌 Some tools require account sign-up for MP4 export without watermark.

Top 3 Free Tools to Trim YouTube Videos to MP4
If you're looking to trim and save YouTube clips as MP4 without spending a dime, here are the top 3 browser-based and software-based tools:
Tool | Features | Best For |
Select & trim any public video, export MP4 | Best for Quick MP4 Extraction | |
Online editor with cut, subtitle, export | Best for Social Media Formatting (TikTok/Reels) | |
Drag-drop timeline editing, watermark-free | Best for Adding Subtitles |
These tools allow users to trim specific timecodes, add basic edits like text overlays or audio tweaks, and download directly to MP4—all for free.
Can You Trim a YouTube Video Without Downloading It?
Yes, but with limitations. YouTube's built-in "Clip" tool allows you to highlight a segment of a video (between 5–60 seconds) and generate a unique shareable link. However, this does not allow you to download the clip or save it as an MP4 file. It only shares the portion within YouTube’s ecosystem.
Official Tool:
YouTube Clip Tool
Create short previews (5–60 seconds)
No editing interface
No MP4 download
Third-party Tools:
Allow downloading, trimming, or stitching multiple segments
Export in MP4, MOV, or audio-only formats
Include more control over output resolution and audio
Best Paid Tools to Clip and Export YouTube Videos Professionally
Free tools work, but if you’re a creator, educator, or brand, premium software offers more control and quality. Here are the top professional tools for advanced YouTube clipping and MP4 export:
Tool | Highlights | Best For |
Clip by transcript, auto-subtitles, MP4 export | Podcasts, educational video editing | |
Timeline editing, color grading, full export suite | YouTube creators, filmmakers | |
Apple-native, real-time edits, seamless MP4 | Mac users, professional editors |
Paid tools allow frame-accurate cutting, clean audio layering, multi-track video mixing, and batch export. These features are invaluable for creators repurposing content for TikTok, Reels, or Shorts.
Pro Tip: Elevate Your Editing by Recording Locally
If you frequently clip your own YouTube live streams—such as sports games with scoreboard overlays or live commerce sessions—you probably notice that downloading clips directly from YouTube results in compressed, lower-quality video.
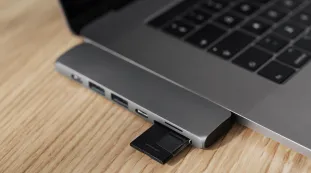
The ultimate workflow for creators is to capture high-definition local footage while streaming. Hardware choice plays a huge role here. For instance, while a wired USB-C camera like the VM20 is great for simple, direct-to-PC setups using the NearSync app, it doesn't support local storage.
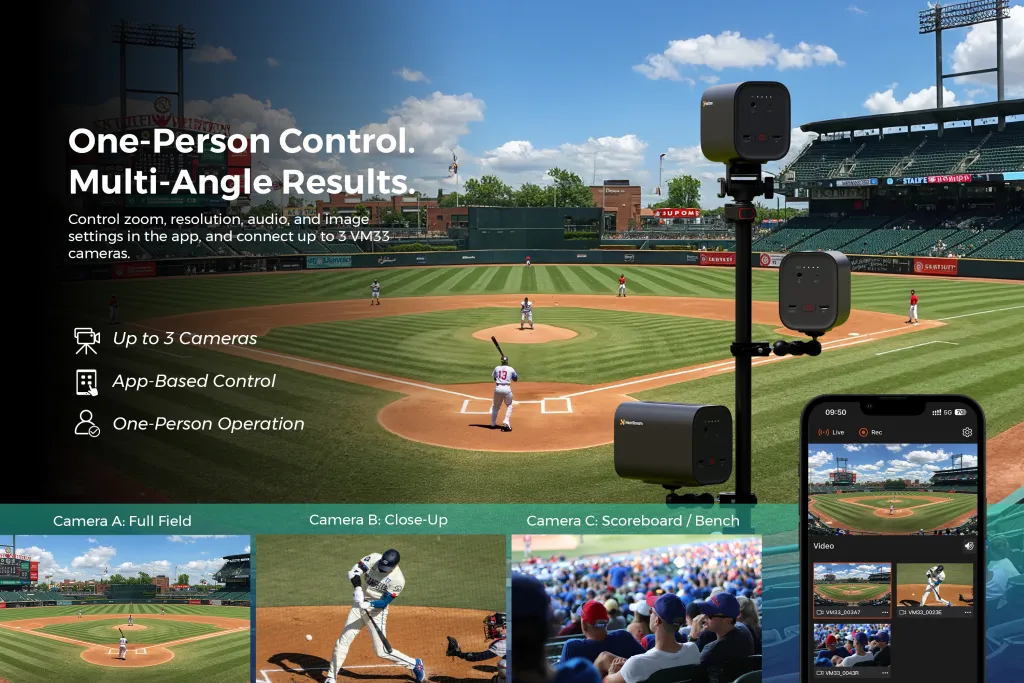
If you want to cut out the hassle of downloading YouTube clips entirely, a wireless multi-cam setup using the NearStream VM33 is a game-changer. Controlled via the NearStream app, the VM33 allows you to broadcast your event to YouTube while simultaneously recording crisp, uncompressed footage directly to its built-in SD card. When the stream ends, your high-res MP4 files are immediately ready for professional editing and clipping—no internet downloading required.
Best Practices for Sharing Clipped YouTube Content Online
Once you’ve clipped and downloaded your YouTube segment, the next step is distribution. Whether you're sharing on TikTok, Instagram Reels, Facebook, or X (formerly Twitter), optimizing for the platform is key.
Platform | Ideal Length | Format | Notes |
TikTok | 9–45 sec | Vertical (9:16) | Add trending audio, use captions |
Instagram Reels | 15–60 sec | Vertical (9:16) | Use branded hashtags for reach |
30–90 sec | Square (1:1) or 9:16 | Schedule via Creator Studio for best performance | |
YouTube Shorts | ≤ 60 sec | Vertical (9:16) | Add #Shorts tag to appear in Shorts feed |
⚠️ Avoid copyright issues: Always clip from content you own or that is Creative Commons licensed.
💡 Tools like Descript or Kapwing let you reformat and subtitle clips to increase engagement.

Common Mistakes to Avoid When Trimming YouTube Videos
Top Mistakes to Avoid:
Clipping Without Context
Sharing a 10-second joke or quote without setup confuses viewers. Always provide enough beginning or ending context.
Cutting Mid-Sentence or Mid-Action
Trimming in the middle of a sentence, gesture, or camera movement makes clips feel abrupt and amateurish.
Poor Audio
A good clip ruined by muffled or noisy audio is hard to watch. Always preview audio and use clean sources.
Wrong Aspect Ratio
Uploading horizontal clips to vertical-first platforms like TikTok or Reels leads to awkward framing. Reformat before posting.
Ignoring Watermarks
Free tools often apply watermarks unless you export under a paid plan. Choose tools like VEED.io’s no-watermark mode or crop it smartly.
Why Audio Quality Matters When Clipping Videos
Visuals catch the eye, but sound holds attention. In short video formats, viewers tolerate basic visuals but abandon clips with unclear or distorted audio. That’s why creators must prioritize sound—especially for commentary, interviews, or educational clips.
According to a 2024 report by Voices.com, 73% of users say they’re more likely to finish a short-form video if the audio is crisp and understandable—even when the video isn’t HD.
Best Practices:
Record with external mics rather than internal phone mics.
Use lavalier or wireless mics for spoken content.
Clean background noise using software like Descript or Adobe Podcast.
Normalize volume across clips to avoid peaks or dips.
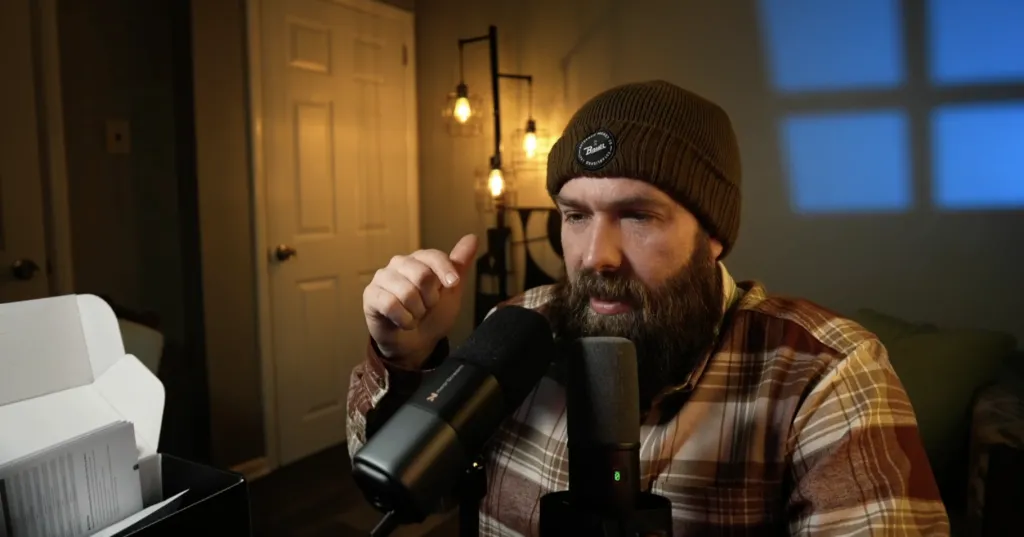
🎤 NearStream Tip:
Creators using NearStream AM25X condenser microphone or wireless mic system report cleaner vocal tone, improved directional sound pickup, and less need for post-processing—ideal for creators clipping highlights from long-form content.
Frequently Asked Questions
How to clip YouTube videos longer than 60 seconds? YouTube's native clip feature caps at 60 seconds. To clip a longer segment (e.g., 2 or 5 minutes), you must use a third-party YouTube trimmer or downloader tool, input your specific start and end times, and download the resulting MP4.
How do I save a clip from a YouTube video to my phone's camera roll? You cannot save clips directly to your camera roll using the YouTube app. You must copy the video link, paste it into a mobile-friendly web browser trimmer tool, download the MP4 to your phone's files app, and then move it to your camera roll.
Can I clip a YouTube video that is not mine? Yes, you can use the native clip link sharing on any public video that allows it. If you are downloading and trimming someone else's video to an MP4, ensure you are adhering to copyright laws and Fair Use guidelines (such as using it for commentary or educational purposes).