


Did you know you can stream on Twitch, YouTube, and even TikTok simultaneously with Streamlabs? Streamlabs Desktop is an excellent tool for beginners because it makes streaming easy right from the start. One helpful feature is Auto-Optimize, which checks your internet and computer to suggest the best settings for your stream. You can also access over 250 free overlay themes to make your stream look professional.
Streamlabs even lets you apply to stream on TikTok without 1,000 followers. You can also add multiple cameras to your stream which is perfect for co-hosting or having guests on. One of the best parts is the built in tipping page so you can earn money from your first stream. This article will show you how to use Streamlabs, pick the best stream settings and go live on any platform.
What is Streamlabs and Why It’s So Popular
Streamlabs is a free, cloud based live streaming software built on top of the open source OBS (Open Broadcaster Software) platform. It’s an all in one suite for content creators—gamers, vloggers, podcasters—to easily broadcast live content to platforms like Twitch, YouTube, Facebook Live and more.
Streamlabs became popular because of its user-friendly interface and all the built-in features that make the broadcasting process easier. Some of its notable tools include customizable overlays, built-in chat support, donation management, and integrated alerts. These features allow creators to engage with their audience more interactively without needing third-party plugins or complex setups.
Also Streamlabs offers monetization options like tip jars, merchandise stores and integrations with Patreon making it a favorite among creators who want to earn money from their streams. The seamless setup and performance optimization tools are especially attractive to beginners and semi-pro streamers who want high quality broadcasts with minimal technical hassle.
Streamlabs vs. OBS at a glance
While both Streamlabs and OBS Studio allow users to create professional-looking streams, several key differences set them apart:
| Feature | Streamlabs | OBS Studio |
| Base Code | Built on OBS open-source code | Original open-source project |
| User Interface | Streamlined, beginner-friendly | More technical, customizable |
| Resource Usage | Requires more system resources | Lighter on system resources |
| Built-in Features | All-in-one solution with alerts, themes | Basic streaming functions only |
| Pricing | Free version with Streamlabs branding; Premium ($19/month) | Completely free |
Notably, Streamlabs Desktop offers pre-built themes and overlays that allow new streamers to establish a professional appearance without design experience. However, this convenience comes at a cost of higher CPU and RAM usage compared to standard OBS.
OBS Studio remains the preferred choice for those seeking maximum customization with minimal resource consumption. Conversely, streamers prioritizing ease of use generally gravitate toward Streamlabs, especially when first learning how to setup streaming software.
Is Streamlabs safe?
Regarding safety, Streamlabs has established itself as a legitimate streaming solution used by millions of content creators worldwide. The software operates through official APIs provided by streaming platforms, ensuring proper authentication processes.
Nevertheless, users should be aware of certain considerations. During installation, the software requests permissions to access streaming accounts, which are necessary for proper functionality. Moreover, the company collects usage data to improve services, though users can adjust privacy settings according to their preferences.
One security advantage of Streamlabs is its partnership with established payment processors for donation handling. This integration reduces the risk of financial fraud that independent streamers might otherwise face when managing donations manually.
Overall, while no software is entirely risk-free, Streamlabs maintains industry-standard security practices. Most concerns about the platform relate to resource usage and premium features rather than safety issues, so first-time streamers can feel safe broadcasting their content.
How to Setup Streamlabs (Step-by-Step)
Setting up Streamlabs is super easy and only takes a few steps even for complete newbies. The platform is designed to be easy for new streamers but still has advanced options for experienced creators.
Download and Install Streamlabs
First, go to the Streamlabs website (streamlabs.com) and click the "Download Streamlabs Desktop" button. Before you install make sure to do these prep steps:
- Install Visual C++ 2017 Redistributable (both 64-bit and 32-bit)
- Get the newest update for your graphics card drivers.
- Make sure your system is updated
- Allow Streamlabs Desktop internet access in your firewall
- Add Streamlabs to your antivirus whitelist so it doesn’t interrupt your stream
After downloading, launch the installer and follow the on-screen instructions to complete the installation.
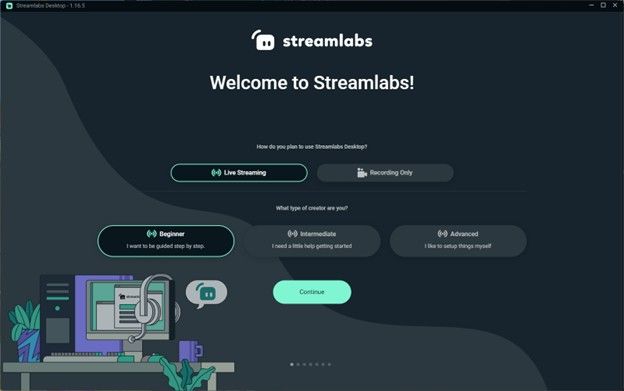
First-Time Setup Wizard: Auto-Optimize for Your System
Streamlabs detects your equipment upon first launch and walks you through the initial configuration. The setup wizard will:
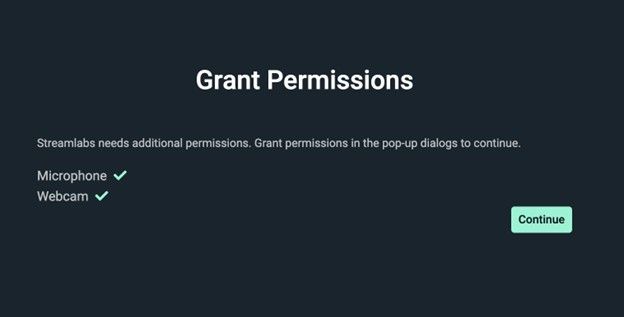
- Request permission to access your microphone and webcam
- Ask about your primary use (recording, live streaming, or camera use)
- Determine your experience level (beginner, intermediate, or advanced)
- Offer to scan your system specifications and internet speed
The Auto-Optimize feature automatically configures optimal settings based on your hardware capabilities and connection quality, eliminating guesswork for new streamers.
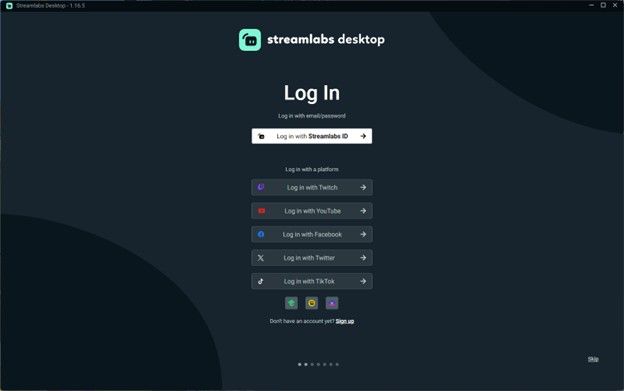
Connecting Your Accounts: Twitch, YouTube, Facebook, Kick
The next step is to connect your streaming platform accounts:
- Sign in with your Streamlabs ID
- For streamers using multiple platforms, you can link additional accounts in the Account Settings section.
- Designate one platform as your primary account for default configurations.
After linking accounts, all events (follows, subscriptions, donations) will display on the same widget URL regardless of platform, creating a unified streaming experience.
Linking Microphones, Cameras, and Capture Devices
Make sure your input devices are set up correctly to ensure top-notch audio and video quality.
Steps to link devices:
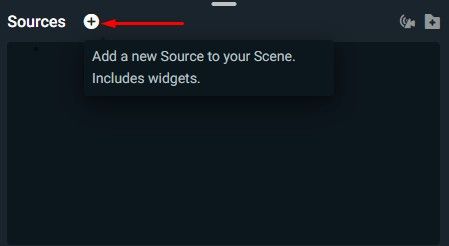
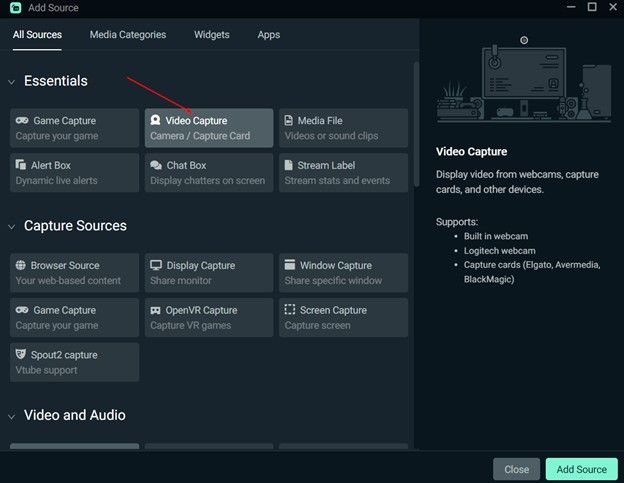
- Go to the Sources section in Streamlabs and click the “+” icon.
- Choose from input options like Audio Input Capture (for mics), Video Capture Device (for webcams), or Game Capture (for gameplay).
- Enter a name for your device (e.g., "Logitech C920" or "Blue Yeti Mic") and select "Add Source."
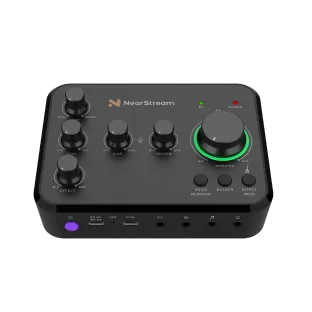
- Select the specific device from the dropdown menu. Use AM25X USB & XLR Condenser Microphone or 4K Streaming Camera VM20 for crystal-clear inputs.
- Adjust the settings as needed for resolution, FPS, and audio volume.
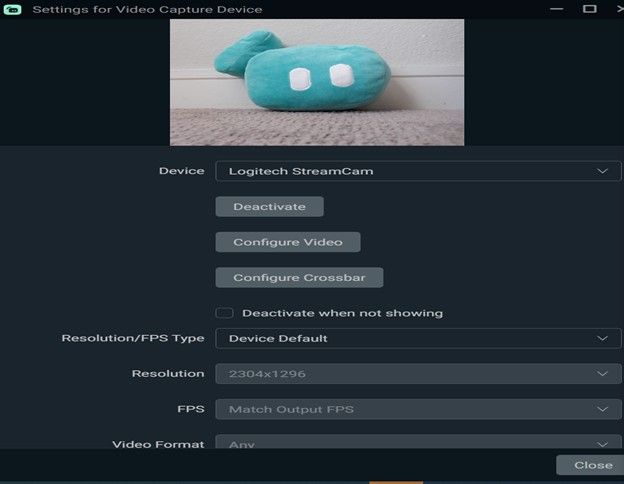
Streamlabs lets you preview and monitor your inputs in real time, so you can fine-tune levels and layouts before going live.
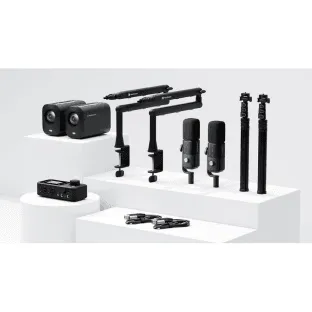
Check out NearStream’s full Streaming Kit or Game Streaming Kit for optimized setups.
How to Add a Microphone
It’s easy to add a microphone!
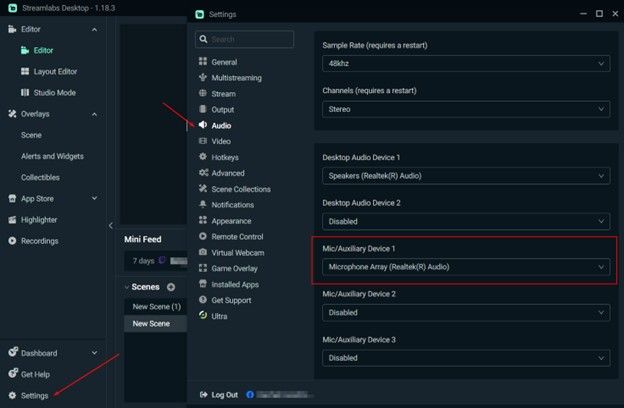
Go to Settings, click Audio, and choose your mic from the list.

Use the AM15X USB Microphone for superior performance or go wireless with the AWM20T Wireless Microphone. If you need more advanced mixing control, the AMIX40U Portable Audio Mixer is a reliable choice. The Podcasting Kit is a complete solution for podcasters.
Need DSLR quality? Try the VM20 4K Streaming Camera or the VM33 Wireless Streaming Camera with 10X Zoom.
Capture every moment from consoles or DSLRs using the 4K60 USB 3.1 Capture Card CCD30.
Stream Labs Setup for First Stream
After installing Streamlabs and connecting your accounts, it's time to prepare your first broadcast by configuring scenes, sources, and audio settings—essential steps before hitting that "Go Live" button.
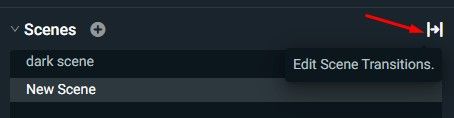
Setting Up Scenes and Sources
In Streamlabs Desktop, scenes act as containers for your visual components. To create a new scene, simply click the plus (+) icon next to the "Scenes" section in the main editor. Initially, set up at least three basic scenes: a main gameplay scene, a starting screen, and a break screen.
You must add sources for each scene by clicking the plus sign (+) in the Sources panel. Sources include elements like webcams, game footage, images, and text. The order of your sources is important. Items higher on the list will appear in front of those below them on your stream.
Adding Your Webcam, Game Capture, Overlays
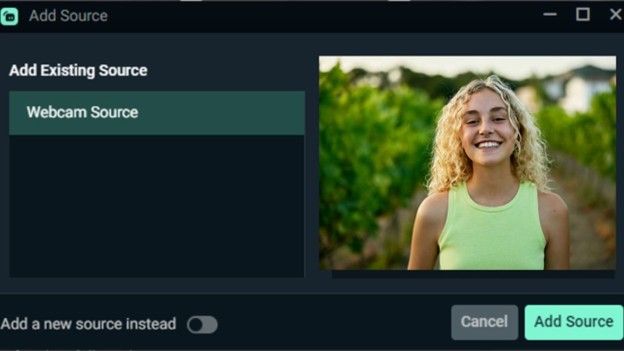
To add your webcam:
- Click the plus sign (+) next to Sources
- Select "Video Capture Device" under Essentials
- Click on "Add Source" and choose your webcam from the dropdown list.
- Adjust the size and position by dragging and resizing the preview

For game capture, add a "Game Capture" source and select either "Auto" mode to automatically detect active games or manually choose specific windows to capture. This approach is safer than screen capture, which might accidentally display personal information.
Enhance your stream's appearance with overlays—these are visual frames that give your broadcast a professional look. Access free overlays through the Streamlabs themes library or import custom designs.
Setting Up Audio Sources Correctly (Microphone, Desktop Audio)
Set up your audio by clicking the gear icon in the Audio Mixer. Select your microphone from the dropdown menu under Audio settings. For desktop audio (game sounds and system audio), verify it appears in the mixer panel.
Use the mixer sliders to balance your voice against game sounds to fine-tune audio levels. Consider keeping your microphone slightly louder than game audio so viewers can hear you clearly.
Testing Before You Go Live: Preview Mode
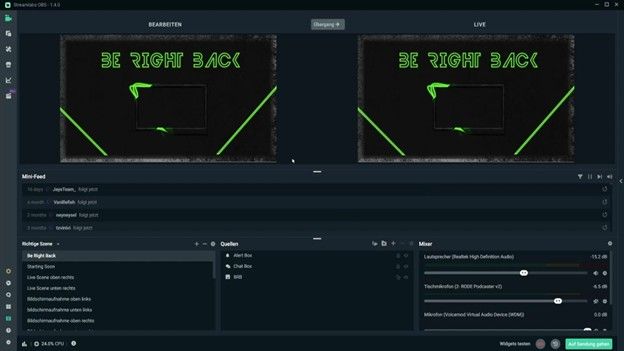
Before broadcasting, test everything in Preview Mode. Click on a scene to see how it will appear to viewers without actually going live. This important step allows you to check your camera placement, overlay alignment, and audio levels.
Use the "Studio Mode" button to compare scenes side-by-side before transitioning. This allows you to prepare your next scene while keeping your current view active for viewers.
How to Stream on Streamlabs (Go Live Guide)
Once scenes and sources are configured, the exciting moment of broadcasting awaits. Going live on Streamlabs involves adjusting several crucial settings to ensure smooth streaming quality for viewers.
Basic Settings to Adjust Before Your First Stream
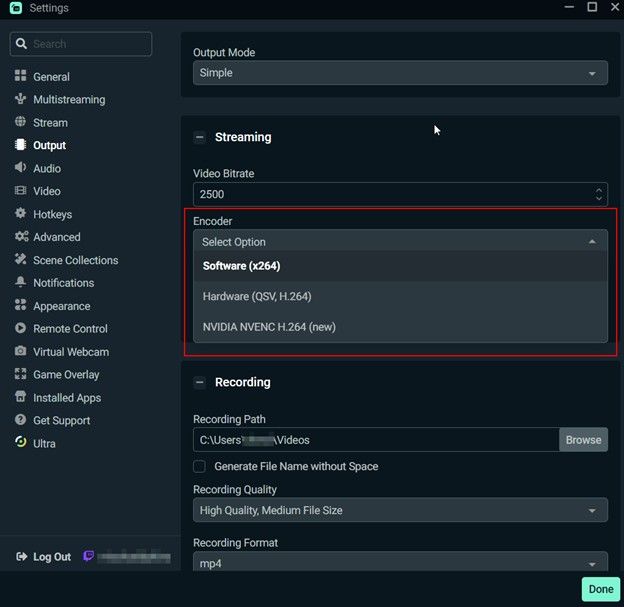
Before broadcasting, fine-tune your stream for optimal performance. First, select your encoder—choose NVENC if using an NVIDIA graphics card, as it utilizes the GPU instead ofthe CPU. X264 works effectively as a software encoder for those without compatible graphics cards.
For resolution settings, beginners should start with 720p at 30fps (1280×720) instead of 1080p to reduce system strain. Next, adjust your bitrate according to your internet upload speed—generally, 3000 kbps for 720p at 30fps or 6000 kbps for 1080p at 60fps.
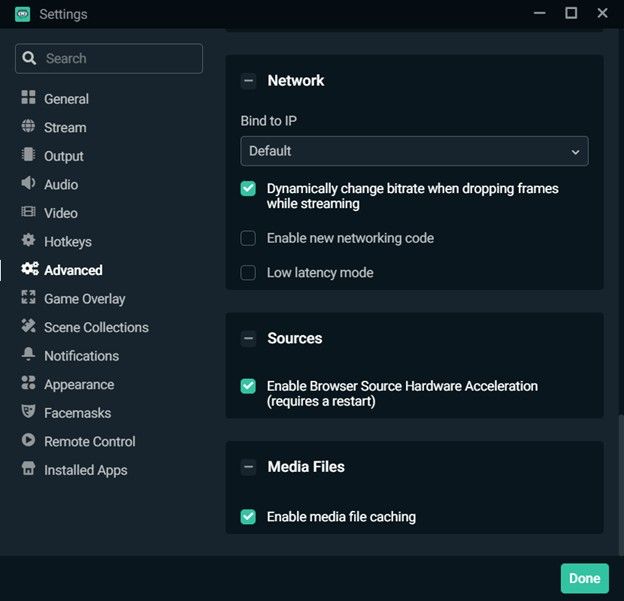
Enable Dynamic Bitrate to prevent dropped frames during network fluctuations. Access this feature by navigating to Settings, then Advanced, and toggling "Dynamically change bitrate when dropping frames while streaming."

Setting Up Stream Title, Category, and Thumbnail
To edit your stream information:
- Click the pencil icon in the top navigation bar
- Update your title to describe your content accurately
- Select the correct category/game by typing and choosing from the dropdown list
- For platforms that support it, upload a custom thumbnail
Alternatively, these details can be modified through the Go Live notification screen right before broadcasting begins.
How to Hit "Go Live" on Streamlabs
The streaming process follows these straightforward steps:
- Click the "Go Live" button located in the bottom right corner of Streamlabs Desktop
- Select your streaming platform(s) in the popup window
- Confirm stream details, including title, description, and other platform-specific settings
- For multistreaming, click "Additional Settings" to configure each platform individually
- Click "Confirm & Go Live" to begin broadcasting
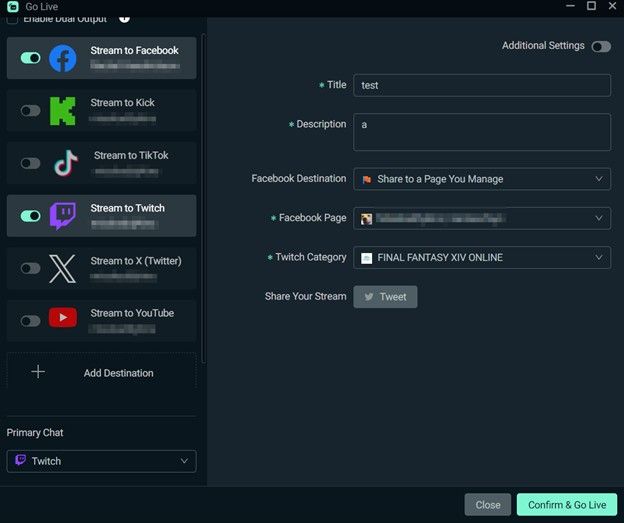
- To end your stream, press the red "End Stream" button

Troubleshooting: If Stream Won't Start or Lag Issues
If experiencing connection problems, check these common fixes:
Install the Microsoft C++ Redistributables, then restart your computer once the installation is complete. Furthermore, update your graphics card drivers—outdated drivers often cause streaming issues.
For persistent problems, try changing the server by going to Settings, Stream, and Custom Ingest. Select a different service temporarily, then choose your desired platform again with a specific server (avoid using "auto").
Go to Settings, Advanced, then Process Priority to adjust your process priority for lag issues. Set it to "Above Normal" or "High" to give Streamlabs more system resources.
Best Stream Settings for Streamlabs (Optimization Guide)
Optimizing stream settings in Streamlabs marks the crucial difference between amateur broadcasts and professional-quality content. The right configuration ensures smooth performance without taxing your system resources. If you're using NearStream streaming kits (USB mics, webcams, etc.), we’ll include tailored tips to help you get the most out of your gear.
Best Video Settings: Resolution, Frame Rate, Bitrate
Find the right balance between frame rate, resolution, and bitrate to achieve the best video quality. Streamlabs Desktop's Auto-Optimize feature automatically scans your system to recommend appropriate settings. Here’s what to optimize:
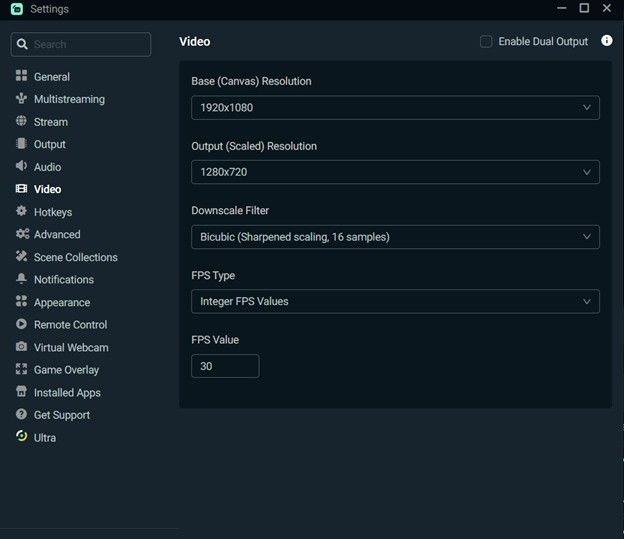
- Base (Canvas) Resolution: Set this to your monitor resolution, typically 1920x1080.
- Output (Scaled) Resolution: If needed, downscale to 1280x720 for smoother streaming on lower bandwidths. This balances quality and performance.
- Downscale Filter: Choose Lanczos (Sharpened Scaling, 36 samples) for best visual clarity.
- Common FPS Values: Stick with 30 FPS for standard quality or 60 FPS for high-motion content (e.g., gaming). Just ensure your PC and internet can handle it.
- Video Bitrate Recommendations:
- 1080p 60FPS: 6000 kbps
- 720p 60FPS: 4500 kbps
- 720p 30FPS: 3000 kbps
NearStream Tip: NearStream USB streaming cameras generally perform best at 720p60 or 1080p30 with high bitrates (4500–6000 kbps). Match your bitrate with your internet speed (more below).
Best Audio Settings: Sample Rate, Bitrate
Great visuals mean little without quality audio. Clean sound helps retain viewers and enhances overall experience.
- Sample Rate: 48kHz (broadcast quality)
- Channels: Use Stereo unless your setup is more advanced.
- Audio Bitrate: 160 kbps for main audio (voice), & 128 kbps for background music (optional)
NearStream Tip: If using a NearStream USB mic, enable noise suppression in Streamlabs (use RNNoise or Speex filters) to eliminate background distractions.
Best Output Settings: Streaming vs Recording
Streamlabs lets you manage different profiles for streaming and recording. Optimize both separately:
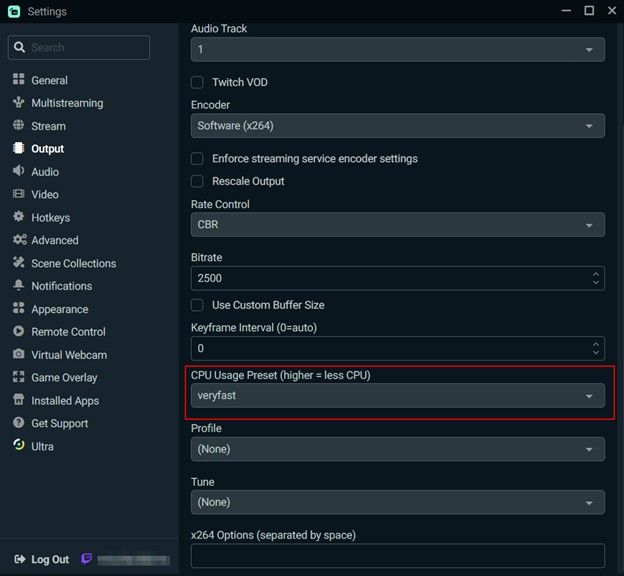
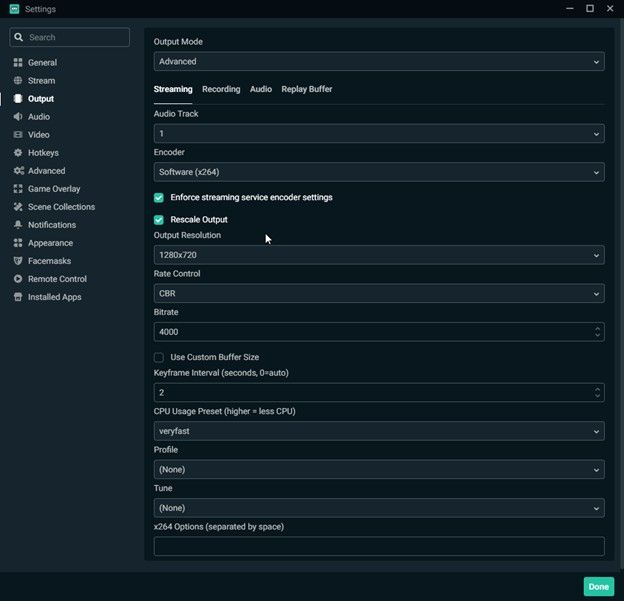
Streaming:
- Output Mode: Advanced
- Encoder: See encoder section below
- Bitrate: Match your resolution/frame rate as mentioned
- Keyframe Interval: 2
- CPU Usage Preset (x264 only): Faster or veryfast
- Profile: High
Recording:
- Type: Standard
- Recording Format: MP4 or MKV (MKV recommended to prevent file loss on crash)
- Audio Tracks: 1–2 (split mic and game audio if needed)
- Encoder: NVENC or x264 (if available, NVENC is less CPU-intensive)
- Recording Bitrate:
- 1080p: 10,000–20,000 kbps
- 1440p: 20,000–30,000 kbps
NearStream Tip: Record at higher bit rates than you stream for better local video quality. Even with a NearStream cam at 720p, recording at 10,000 kbps will yield cleaner archived videos.
Internet Speed Requirements and Adjustment Tips
Your upload speed directly impacts stream quality:
- Minimum 3.6 Mbps for 720p/30fps streams
- 7.2 Mbps recommended for 1080p/60fps content
Tips to Adjust:
- If your connection is unstable, reduce bitrate, resolution, or FPS.
- Use Ethernet instead of Wi-Fi for a stable connection.
- Enable Dynamic Bitrate in Streamlabs to automatically adjust bitrate during internet fluctuations.
NearStream Tip:
If you're using a NearStream kit with a Wi-Fi-only laptop, consider a USB to Ethernet adapter for smoother, consistent streams
Selecting the Right Encoder: NVENC vs x264
Encoders handle the compression of your video stream. Your choice affects performance and stream quality.
x264 (CPU encoding): x264 is a software-based encoder that relies heavily on your CPU to compress video data. It’s known for producing high-quality video output, especially at lower bitrates. However, this quality comes at the cost of CPU resources, which can be an issue if you're gaming or multitasking during your stream.
- Uses your processor to encode video
- Better quality at lower bitrates
- Ideal if you have a dedicated streaming PC or a powerful CPU
NVENC (GPU encoding): NVENC is a hardware-based encoder built into NVIDIA graphics cards. It allows video encoding to be offloaded from the CPU to the GPU. This results in much lower CPU usage, which is ideal for systems with less powerful processors or those doing CPU-intensive tasks while streaming.
- Offloads encoding to your graphics card
- Minimal impact on game performance
- Superior with text clarity and fast-moving gameplay
- Recommended for RTX graphics cards
Which One Should You Use?
- If you have a modern NVIDIA GPU (GTX 1660 or better): Use NVENC (new).
- If you have a strong CPU and no discrete GPU: Use x264, with faster or veryfast preset.
NearStream Tip: If you’re streaming with a NearStream camera on a basic laptop, prioritize NVENC or hardware encoding options available to reduce CPU load and prevent stuttering.
Bonus Tips for a Better Streamlabs Experience
Streaming successfully isn’t just about having the right equipment. It’s also about maximizing the tools at your disposal. Streamlabs has powerful features that can take your stream from basic to professional with just a few tweaks. Here are some bonus tips to help you get the most out of your Streamlabs experience.
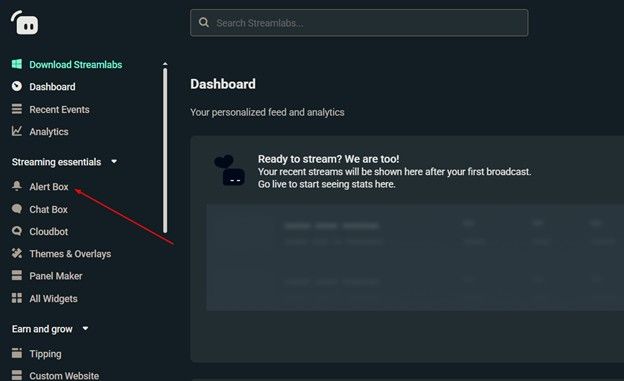
1) Adding Alerts and Widgets
Alerts and widgets are essential for engaging your audience and giving real-time feedback during your stream. Whether it’s a new follower, donation, subscription, or raid, on-screen alerts make your viewers feel recognized and appreciated. To add them, simply go to the Streamlabs dashboard, click “Alert Box,” and customize your alerts by uploading unique sounds, GIFs, and animations.
Some of the most useful widgets include the Chatbox, Event List, Goals such as Donation or Follower, Stream Boss, and Sponsor Banner. It’s important to keep your alert duration short (3-5 seconds) to avoid interrupting gameplay or commentary.
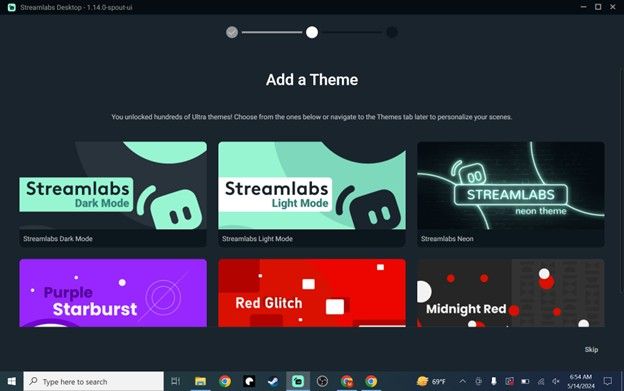
2) Using Custom Overlays and Themes
A sleek, branded overlay makes your stream look more professional and cohesive. Streamlabs offers both free and premium (Prime) themes that you can customize for your channel's personality and content style. You can find these by heading to the “Themes” section in the Streamlabs app and browsing categories such as Just Chatting, Gaming, and IRL.
Additionally, you can upload your own overlays or source them from third-party platforms like Nerd or Die, OWN3D, and Placeit. Make sure your overlays don’t clutter the screen—opt for a clean design that complements your content.
3) Integrating Chatbots for Engagement
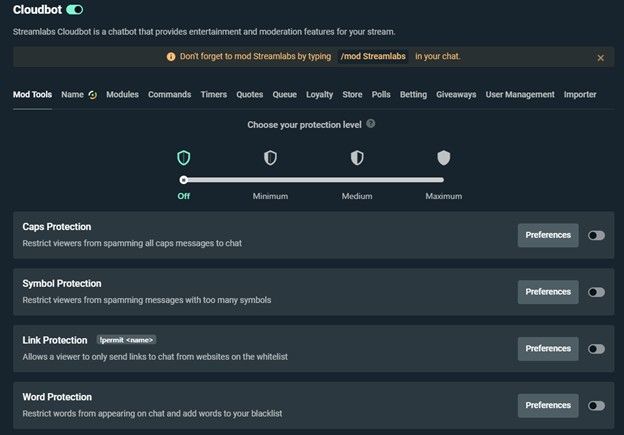
Integrating a chatbot into your stream is another great way to boost engagement and keep your chat organized. Streamlabs comes with Cloudbot, a built-in chatbot that can automate moderation, run fun games, and reward loyal viewers. Enabling Cloudbot is easy. Open the Streamlabs dashboard, go to “Cloudbot,” switch it on, and set up the modules you want to use.
Chatbots can significantly reduce spam, handle custom commands, host giveaways, and encourage interaction through loyalty points. Use chat commands such as !social, !uptime, and !commands to provide viewers with useful info and boost engagement.
4) Monitoring Performance Using Streamlabs Dashboard
Keeping an eye on your stream’s performance ensures a smooth viewer experience. The Streamlabs Dashboard shows useful info like analytics, CPU and FPS stats, stream health, and other performance details. Monitoring bitrate stability, dropped frames, viewer count, chat activity, and revenue tracking can help you make informed decisions about your stream settings.
You can access these insights either through the Streamlabs desktop client or its browser-based dashboard by going to the “Analytics” or “Recent Events” section. Use these insights to optimize stream settings and identify what content resonates most with your audience.
H2: FAQs about Using Streamlabs
Is Streamlabs Free?
Yes, Streamlabs has a free version that includes essential streaming features such as scene setup, alerts, and webcam support. It’s a great starting point for beginners. If you want extra features, you can get Streamlabs Prime for $19 a month or $149 a year. Prime offers extras like multistreaming, no watermarks, over 600 premium overlays, detailed analytics, and custom sponsor pages.
Can I Use Streamlabs for TikTok Live Streaming?
Yes. Streamlabs fully supports TikTok Live streaming through direct integration. Notably, even streamers without 1,000 followers can apply for TikTok streaming through Streamlabs. Connecting your TikTok account involves selecting the platform, signing in, and customizing your stream title and settings.
What Should I Upgrade First: Mic, Camera, or Internet?
The microphone should be your first upgrade; clear audio is critical to viewer engagement. Poor sound can quickly drive viewers away. Next, ensure your internet connection is stable to prevent buffering issues. Finally, upgrade your camera once your audio and connection are reliable. Audiences are generally more forgiving of average video than poor audio.
Can I Stream to Multiple Platforms at Once?
Yes, albeit this feature requires Streamlabs Prime subscription. Multistreaming allows simultaneous broadcasting to Twitch, YouTube, Facebook, and other platforms from a single stream setup. Importantly, this expands your potential audience reach without additional work. If you’re not ready to invest in Prime, you can still record your stream and upload it to other platforms afterward.
Final Thoughts on Your Streamlabs Journey
Streamlabs Desktop empowers creators to launch their streaming journey with ease. Whether you're new or experienced, its user-friendly design, customizable widgets, and Auto-Optimize features simplify the setup process. By starting with basic settings like 720p at 30fps, you can gradually enhance your stream as you gain confidence. Success in streaming comes from balancing technical quality with viewer interaction. Focus on building a consistent schedule, engaging your audience, and experimenting with creative content to find your unique style. Streamlabs gives you the tools—your passion brings it to life.
Ready to level up your stream? Explore premium tools and gear at NearStream to enhance your setup and go live like a pro.