


You spent hundreds, maybe thousands of dollars on a DSLR or Mirrorless camera. So why does your Zoom call or Twitch stream look like it was filmed with a potato?
Most people settle for cheap USB webcams because they are "easy." But ease comes at a cost: grainy low-light performance and flat colors. The truth is, you likely already own a Hollywood-grade camera; you just aren't connecting it correctly.
In this guide, we will show you exactly how to use DSLR as webcam using a capture card, unlocking that professional, blurry-background look that sets top creators apart.
Why You Need to Learn How to Use DSLR as Webcam
When viewers open a stream, they make a subconscious judgment in the first 3 seconds. Is this high production value? Or is it amateur?
The difference usually isn't the lighting; it's the Sensor Size.
- Webcams: Use tiny sensors (smaller than your pinky nail). They struggle to gather light, resulting in "noise" or grain, especially in bedrooms.
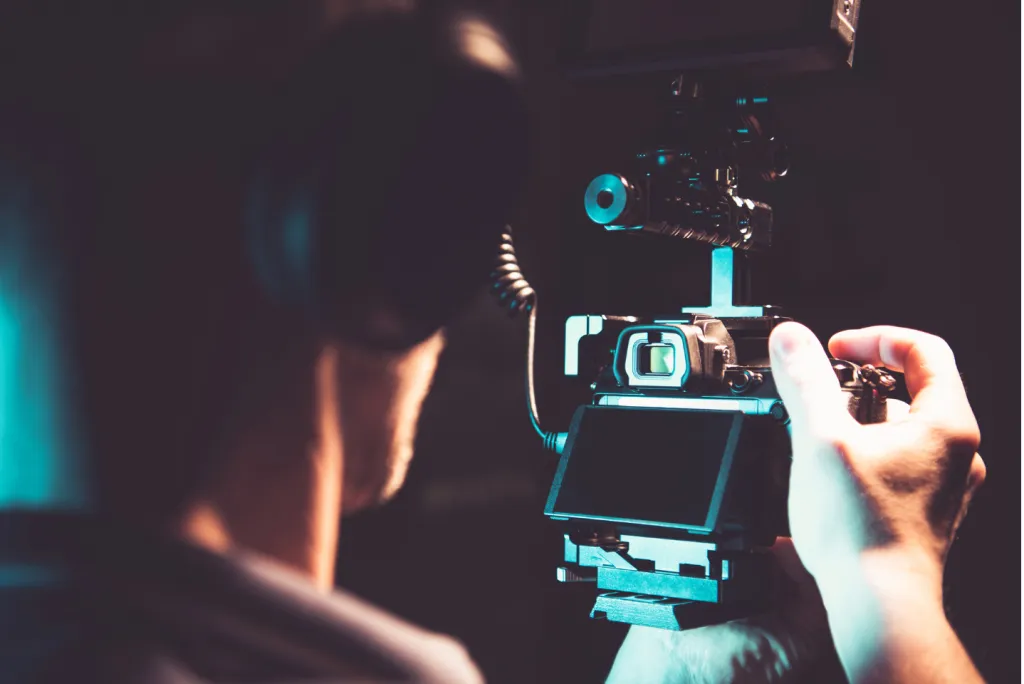
- DSLR/Mirrorless: Use massive APS-C or Full Frame sensors. They drink in light, creating vibrant colors and that beautiful "Bokeh" (blurry background) that separates you from your messy room.
If you search for how to use dslr as webcam, you are making the decision to upgrade your personal brand.

Table 1: The Visual Difference: Webcam vs. DSLR Setup
| Feature | Standard USB Webcam (e.g., C920) | DSLR + NearStream Capture Card |
|---|---|---|
| Resolution | 1080p (Highly Compressed) | Uncompressed 1080p / 4K |
| Depth of Field | Flat (Everything is in focus) | Bokeh (Cinematic blurred background) |
| Low Light | Grainy / Noisy | Clean / Bright |
| Lenses | Fixed / Wide Angle (Distorted) | Interchangeable (Portrait/Zoom) |
| Color | Washed out / Grey | Vibrant / Accurate Skin Tones |
| Focus | Slow "Hunting" | Instant Eye-Autofocus (Sony/Canon) |
The Trap: Official USB Software vs. Capture Card for Streaming
Before you buy anything, you might try a free shortcut. Camera manufacturers like Canon (EOS Webcam Utility), Sony (Imaging Edge), and Nikon have released software that lets you plug your camera in via USB.
Do not use them.
While "free" sounds nice, these USB utilities are a trap for professional streaming.
- Resolution Limit: Most USB utilities cap the video feed at 576p or 720p. You are taking a 4K camera and forcing it to output DVD quality.
- Low Frame Rate: The USB data bus on cameras is designed for transferring photos, not live video. This results in a choppy 15-20 fps feed that looks like a bad stop-motion animation.
- High Latency: There is often a significant delay between your voice and your lips moving.
The Solution: HDMI.
To get the raw power of your camera, you must bypass the USB port and use the HDMI Output. This requires a dedicated capture card for streaming like NearStream.
- Bandwidth: HDMI carries uncompressed video data instantly.
- Result: You get a fluid 60fps signal at full 1080p or 4K resolution with zero lip-sync issues.
Choosing the Best Capture Card for Your Camera
Not all capture cards are created equal. When connecting a high-end camera, you need a card that respects the source material.
NearStream is the best capture card for this specific workflow for three reasons:
1. YUY2 Color Accuracy (The "Skin Tone" Factor)
Cameras capture billions of colors. Cheap capture cards compress this color data into MJPEG format, which makes skin tones look blocky or "greenish."
NearStream supports YUY2 (4:2:2) Uncompressed format. This preserves the subtle gradients in your skin tone and lighting, ensuring that the "Canon Color Science" or "Sony Look" you paid for actually reaches the stream.
2. Driver-Free Simplicity
Camera setups are complex enough; you don't need to fight with drivers. NearStream uses the UVC Standard.
- Plug & Play: Connect it to your camera and PC, and it instantly appears as "NearStream Camera" in Zoom, Teams, OBS, or Discord. No software installation required.
3. Compatibility
NearStream works seamlessly with Micro-HDMI (Sony), Mini-HDMI (Canon), and Full HDMI outputs, supporting resolutions from 720p all the way up to 4K 30fps input.

Step-by-Step: How to Use DSLR as Webcam with NearStream
Ready to build your setup? Here is the definitive hardware and software workflow.
Phase 1: The Hardware Chain
- Identify Your Port: Check the side of your camera.
- Sony A6000/A7 series: Usually Micro-HDMI.
- Canon M50/R series: Usually Micro-HDMI or Mini-HDMI.
- Panasonic GH5: Full HDMI.
- Connect the Cable: Plug the appropriate HDMI cable into your camera.
- Connect to NearStream: Plug the other end (Standard HDMI) into the Input of the NearStream capture card.
- Connect to PC: Plug the NearStream USB end into a USB 3.0 (Blue) port on your computer.
Phase 2: The Critical Step - "Clean HDMI"
If you turn on your camera now, you will likely see all the camera icons (battery level, ISO, focus box) on your stream. We need to remove these. This feature is called Clean HDMI.
- Canon: Menu > Shooting Settings > HDMI Info Disp > Clean FHD Output.
- Sony: Menu > Setup > HDMI Settings > HDMI Info. Display > Off.
- Nikon: Menu > Setup Menu > HDMI > Advanced > Live View On-Screen Display > Off.
- Panasonic: Menu > Setup > HDMI Rec Output > Info Display > Off.
Note: If your camera is very old (e.g., Canon T3i/600D), it might not support Clean HDMI without custom firmware like Magic Lantern.
Phase 3: The Power Solution (Dummy Battery)
Streaming kills batteries. A standard battery lasts 45 minutes. You cannot swap batteries in the middle of a live broadcast.
- The Fix: Buy a "Dummy Battery" (AC Power Adapter). It replaces your battery and plugs directly into a wall outlet, giving you infinite power.
Optimizing OBS for Your New Camera
Now that the hardware is connected, let's configure OBS Studio to get the sharpest image.
- Add Source: Click + > Video Capture Device.
- Select Device: Choose NearStream Capture.
- Resolution: Set to Custom > 1920x1080.
- FPS: Match your camera settings.
- Pro Tip: If your camera is set to Movie Mode 60fps (NTSC), set OBS to 60. If you want a "Cinematic" look, set your camera to 24fps and OBS to 24 or 60.
- Video Format: Select YUY2. (Do not leave on "Any" or "Default").
- Color Space: 709.
- Color Range: Partial (Cameras usually output limited HDMI range).
Troubleshooting Common Camera Streaming Issues
Table 2: Camera Setup Diagnostics
| Problem | Likely Cause | Solution |
|---|---|---|
| Camera shuts off after 30 mins | Auto Power Off / Overheat | Disable "Eco Mode" or "Auto Power Off" in camera menus. For Sony, set "Auto Power OFF Temp" to High. |
| On-screen icons are visible | Clean HDMI Off | Go to camera HDMI settings and turn off "Info Display." |
| Video is distorted / stretched | Resolution Mismatch | Ensure camera output is 1080p/4K and OBS is set to the same aspect ratio (16:9). |
| Focus is hunting | AF Settings | Set camera to Face/Eye Detection AF. Ensure "Movie Servo AF" is Enable (Canon). |
| Lip Sync Delay | Audio Latency | Add a Sync Offset (approx 100-200ms) to your microphone in OBS Audio settings. |
Conclusion
Upgrading from a webcam to a DSLR or Mirrorless camera is the single biggest leap you can make in your streaming career. The depth of field, the color accuracy, and the low-light performance will instantly distinguish you from the thousands of streamers using grainy USB cams.
However, a great camera needs a great connection. Don't bottleneck your $1,000 lens with free, laggy USB software. Invest in a dedicated capture card for streaming like NearStream. By using hardware encoding and an uncompressed HDMI signal, you ensure that every pixel of quality your camera captures is delivered faithfully to your audience.
Stop letting that beautiful camera gather dust on a shelf. Plug it in, turn off the info display, and show the world your true colors.

FAQ: Frequently Asked Questions
Q1: Can I use any camera as a webcam?
A: Most modern cameras (post-2015) work. The key requirement is HDMI Output. Check if your camera has a Mini or Micro HDMI port. Secondly, verify it has "Clean HDMI" (the ability to hide on-screen icons). Some older entry-level DSLRs lack Clean HDMI.
Q2: Will streaming damage my camera sensor?
A: Generally, no. Modern mirrorless cameras are designed for video. However, heat is the enemy. Streaming for 8 hours at 4K can cause overheating. We recommend setting your camera to 1080p output for long streams to keep it cool, and always flip the screen out to help heat dissipation.
Q3: Do I need a 4K capture card for a 4K camera?
A: Not necessarily. If you are streaming to Twitch (which is limited to 1080p), a 1080p 60fps capture card is sufficient. Your camera can record in 4K internally, but output 1080p over HDMI. However, a NearStream 4K capture card gives you "Future Proofing" and allows for sharper downscaling.
Q4: Why does my video look laggy compared to my voice?
A: HDMI video takes a split second longer to process than USB microphone audio. This creates a sync issue. To fix this, go to OBS Audio Mixer > Click the Gear Icon > Advanced Audio Properties. Add a Sync Offset (usually 100ms to 200ms) to your Microphone to delay the audio so it matches the video lips.
Q5: What lens is best for streaming?
A: For that "blurry background" look, you want a fast prime lens with a low f-stop number, like f/1.8 or f/1.4.
- Popular choice: Sigma 16mm f/1.4 (Wide angle, great for talking head).
- Budget choice: Canon 50mm f/1.8 "Nifty Fifty" (Very zoomed in, camera needs to be far away).


