


Most new creators start their streaming journey from a console—over 60% of first-time streamers go live from Xbox or PlayStation (Streamlabs, 2024). Yet, the majority only broadcast to a single platform, missing out on massive audiences on TikTok, YouTube Shorts, and more.
Why? Traditional multistreaming usually requires a capture card, a powerful PC, and complex setup workflows.
Streamlabs Console changes everything. It’s a browser-based streaming platform designed specifically for Xbox users—no extra hardware or software needed. You can go live to Twitch, YouTube, Kick, and TikTok simultaneously.
In this guide, we’ll walk you through every step:
What is Streamlabs Console? (The Ultimate Multi-Platform Streaming Tool Designed for Xbox Players)
Streamlabs Console is an online streaming tool specially designed for Xbox users, allowing you to easily stream your gameplay simultaneously to Twitch, YouTube, Kick, and TikTok—no capture card or PC needed. Through your browser, you can remotely manage your stream layout, scenes, and transitions for flexible and efficient control.
Think of it as a web-based OBS tailored for console players, supporting custom horizontal or vertical layouts for each platform, and enabling you to add webcam feeds, text overlays, chat, and effects remotely. Whether you’re a first-time streamer or an experienced broadcaster looking to enhance your stream quality, this detailed guide will walk you step-by-step through setting up and using Streamlabs Console, helping you start a professional multi-platform streaming experience with ease.
Step 1 – Connect Your Streaming Platforms
Before going live, link the platforms you want to stream to:
Open Streamlabs Console on your phone, tablet, or computer browser.
Navigate to Streaming Destinations.
Connect Twitch, YouTube, Kick, and/or TikTok.
Enable the toggle for each platform if you plan to multistream.
Choose a horizontal or vertical layout for each platform (e.g., Twitch = horizontal, TikTok = vertical).
⚠️ Note: YouTube requires verification before your first live stream, which can take up to 24 hours. Make sure to complete this step in advance.
Step 2 – Customize Your Layout and Scenes
This step lets you personalize your stream:
In the Streamlabs Console dashboard, click on Scene Collections.
Create different scenes such as:
Live Scene: gameplay + webcam + chat overlay
BRB Scene: custom message or image when away
Webcam-Only Scene: for chatting or breaks
Use drag-and-drop to position elements like alerts, webcam, and logos.
Customize horizontal and vertical layouts independently to best suit each platform.
✅ Pro Tip: For vertical platforms like TikTok, set your canvas height to 1920px to ensure full-screen coverage.
Step 3 – Add Green Screen Effects (Optional)
To give your stream a polished look, consider using green screen effects:
Add a webcam source to your scene.
Enable the chroma key filter to remove the green screen background.
Adjust settings like similarity, smoothness, and spill reduction for a clean effect.
Preview your video to confirm the background is fully removed without affecting your appearance.
Note: Streamlabs Console currently supports only green screen (chroma key) effects. Background blur or replacement without a physical green screen is not supported. Looking for an easy-to-use lighting and green screen kit? The NearStream VK40 offers soft, adjustable lighting and a foldable green screen—perfect for Xbox streamers aiming for high-quality background removal.

How to Go Live from Xbox Using Streamlabs Console
Once your scenes and platform connections are set up:
Launch your game on Xbox.
Press the Xbox button to open the guide.
Navigate to Capture & Share.
Select Live Stream, and log into Twitch if prompted.
Under More Options, choose Streamlabs as the streaming destination.
Customize your stream title and check audio/output settings as needed.
Select Go Live Now.
Your stream will go live on Twitch and any other connected platforms. While streaming, you can still control scenes and layouts remotely via your phone or laptop through Streamlabs Console.
Pro Tips for Smoother Console Streaming
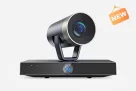
Use a high-quality microphone, like the NearStream AM25X, for clear, noise-cancelled audio.
Prefer Ethernet connection over Wi-Fi to reduce latency.
Add a facecam using a mobile input or Xbox-compatible webcam to personalize your broadcast.
Test scene transitions and audio levels beforehand in the Console editor.
According to Twitch Creator Camp, streams with both audio and facecam overlays see up to 25% higher viewer engagement.
How to Configure Dual Output Layouts
Streamlabs Console allows you to create separate layouts tailored for each platform’s screen orientation:
In the editor, create or open your Scene Collection.
Design a horizontal layout for platforms like Twitch and YouTube.
Design a vertical layout for TikTok and Kick.
Position overlays, alerts, webcam, and text accordingly for each layout.
Go to Project Settings → Platform Settings and assign each platform to the preferred layout.
Enable streaming output for all platforms before going live.
Preview each layout in the editor to fine-tune element placement.

Design Tips for Vertical Layouts
Vertical screens have limited space, so keep your layout clear:
Use larger fonts for on-screen text.
Center the gameplay window vertically to fit mobile views.
Resize the facecam overlay to fill the top or bottom third of the screen.
Minimize overlays to avoid clutter.
Set vertical canvas height to 1920px for optimal display.
Frequently Asked Questions (FAQ)
Q1: Can I stream on Streamlabs Console without a PC?
Yes, you can stream directly from your Xbox with no PC needed.
Q2: How do I set up green screen video on Streamlabs Console?
Enable chroma key in your webcam settings and ensure your green screen is evenly lit.
Q3: Can I stream simultaneously on Twitch, YouTube, and TikTok?
Yes, Streamlabs Console supports multistreaming to multiple platforms at once.


