


According to Semrush, “how to screen record on iPhone” gets over 110,000 searches per month, while the keyword itself sees around 10,000 searches monthly. This shows that many iPhone users are still unsure how to record their screen, calls, or audio. If you’re one of them, don’t worry—I’ve got you covered. In this guide, I’ll show you how to easily screen record, record calls, and capture audio on your iPhone, step by step.
How to Screen Record on iPhone: The Basics
What Is Screen Recording on iPhone?
Screen recording is a feature on the iPhone that allows you to capture everything happening on your screen. This includes videos, apps, tutorials, games, or even a live session. Whether you’re a content creator, educator, or simply someone who needs to capture something from your screen, knowing how to screen record on iPhone is a must.
How to Screen Record on iPhone: Step-by-Step Tutorial
Wondering how to screen record on iPhone? Here’s a simple guide to help you get started with screen recording on iPhone:
- Enable Screen Recording on iPhone
- Open the Settings app on your iPhone.
- Scroll down and tap on Control Center.
- Tap on Customize Controls.
- Find Screen Recording and tap the + button next to it to add it to your Control Center.
- Start Screen Recording on iPhone
- Swipe down from the top-right corner of your screen (or swipe up if you have an older iPhone model) to open the Control Center.
- Tap the screen recording icon (a circle within a circle). This will begin recording everything on your screen.
- If you want to include sound, press and hold the screen recording button, then tap the Microphone to turn it on.
- How to Stop Screen Recording on iPhone
- When you’re done recording, tap the red status bar at the top of the screen and press Stop.
- Your video will automatically be saved in your Photos app.
This video demonstrates how to add the screen recording feature to your iPhone's Control Center:

How to Record Calls on iPhone: The Reality of Recording Phone Conversations
Apple doesn’t offer a native feature to record calls on iPhone directly due to privacy and legal concerns. But don’t worry—how to record a phone call on iPhone can still be done through third-party apps or iOS built-in features. Let’s walk through the options you have.
Method 1: Using iPhone’s Built-in Call Recording
With iOS 18.1 or later, Apple introduced the built-in call recording feature, making it easier than ever to record calls on iPhone. Here’s how to use this feature:
- Initiate the Call
- Start by making a phone call or answering an incoming call as you normally would.
- Start Recording
- Once the call is connected, you’ll notice a “Record” button in the top-left corner of your screen.
- Tap the “Record” button to begin recording the call.
- Notification
- As soon as you tap the record button, both you and the other party will hear a notification sound, letting everyone know that the call is being recorded.
- Automatic Saving
- When the call ends, the recording will automatically be saved to the Notes app, along with a transcript of the conversation.
- Reviewing the Recording
- To access the recording, open the Notes app. You’ll find your recording saved there as a note, along with the transcript (if available).
- Tap the notification or open the specific note to find the recording and transcript for review.
- Ending the Recording Early
- You can also stop recording before the call ends. Just tap the record button again, and the recording will stop, saving the file in the Notes app immediately.
Pro Tip: Always get consent from the other party before recording a call, as recording laws vary by state and country.
Method 2: How to Record Calls on iPhone Using Third-Party Apps
While Apple’s built-in recording feature works well, it’s not always available in every country or region, and it’s somewhat limited. If you’re looking for more flexibility or additional features like cloud storage or unlimited recordings, third-party apps can offer a great solution.
Here’s how you can record calls on iPhone using third-party apps:
- Choose a Third-Party App
There are a variety of apps available for call recording on iPhone, such as:
- Rev Call Recorder
- TapeACall
- Call Recorder - IntCall
- Phone Call Recorder
- Download the app of your choice from the App Store.
- Set Up the App
After downloading the app, follow the setup instructions, which may include granting the app access to your contacts and allowing call recording permissions. Some apps require you to use their service to dial calls, while others work with your regular iPhone dialer.
- Start Recording
- Open the app and follow the instructions to record a call.
- For most apps, you’ll need to dial a recording number first, then dial the person you want to talk to. Once the call is connected, the app will record both sides of the conversation.
- Review the Recording
- After the call ends, you’ll be able to find the recording within the app.
- Some apps also offer cloud storage, meaning you can access your recording from any device.
- Storage and Transcripts
- Depending on the app you use, you may be able to get automatic transcripts, share recordings directly to email, or save them to cloud services like Dropbox or Google Drive.
This video demonstrates how to record and transcribe calls on iPhone:

How to Record Audio on iPhone: 3 Professional Methods
Recording audio on your iPhone is easy, whether you’re creating a podcast, recording an interview, or simply capturing notes or ideas. iPhones come with several built-in tools that can help you capture high-quality sound, but there are also third-party apps that can provide more advanced features.
Step-by-Step Guide to Record Audio on iPhone
- Method 1: How to Do Audio Recording on iPhone with Voice Memos
The easiest way to record audio on your iPhone is by using the Voice Memos app, which comes pre-installed on all iPhones.
- Open the Voice Memos app: Find and tap on the Voice Memos app on your iPhone.
- Start Recording: To begin recording, tap the red record button at the bottom of the screen. Speak clearly into the microphone, and the app will capture your audio.
- Pause or Stop: You can pause the recording at any time by tapping the pause button. When you’re finished, tap the stop button.
- Review Your Recording: After stopping the recording, you’ll see your new audio file listed in the app. Tap on the recording to listen, rename it, or delete it if needed.
- Save or Share: You can save the recording or share it directly from the app via email, AirDrop, or cloud services like iCloud.
- Method 2: How to Record Audio on iPhone with Third-Party Apps
If you want more control over your audio recording, or if you need features like editing, enhanced sound quality, or multi-track recording, you may want to try third-party audio recording apps such as:
- GarageBand: This free app by Apple offers professional-level audio recording and editing features.
- Ferrite Recording Studio: Great for podcasting and voiceover work, with multi-track support and robust editing tools.
- AudioShare: A powerful audio file manager and recorder with the ability to organize and manipulate your recordings.
In third-party apps, the process is quite similar—open the app, press the record button, and start speaking. Depending on the app, you may have options to edit the audio, apply effects, or enhance sound quality.
Pro Tip: How to Record Studio-Quality Audio on iPhone
While the iPhone’s built-in microphone is good for casual recordings, it can’t compete with the clarity and richness of a professional-grade microphone. If you’re serious about recording high-quality audio, especially for podcasts, voiceovers, or interviews, consider using an external microphone.

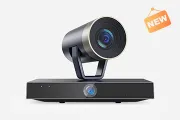
The NearStream AM25X is a condenser microphone that captures clear, detailed audio, making it ideal for studio-quality sound. If you’re looking for more flexibility, the NearStream AWM20T Wireless Microphone allows you to move freely while recording, without compromising audio quality.
These microphones can be easily connected to your iPhone via the Lightning port, and they’ll drastically improve your recordings. Whether you’re recording indoors or on-the-go, using an external mic ensures a professional sound that the built-in iPhone mic simply can’t match.
How to Do Audio Recording on iPhone: Advanced Options
For more advanced audio recording, GarageBand is the go-to app for musicians, podcasters, and voiceover artists. It’s free and offers a bunch of features that will take your audio recordings to the next level.
- Open GarageBand
- Download and open GarageBand from the App Store (if you don’t have it already).
- Select the Audio Recorder option to start recording.
- Connect an External Mic
- For top-quality sound, plug in an external microphone like the NearStream AM25X.
- You can adjust the settings to record different instruments or vocals depending on your needs.
- Start Recording
- Hit the red record button to start capturing your audio. You can add effects, layers, and even mix the sound afterward.
How to Screen Record iPhone: Video and Audio Simultaneously
There are plenty of occasions when you might want to record both video and sound at the same time. Whether it’s for tutorials, gameplay, or presentations, here’s how to do it:
- Start Screen Recording with Audio
- Go to the Control Center and press and hold the screen recording button.
- Toggle the Microphone to the “on” position.
- Now, when you start the recording, both your screen and your voice will be captured.
- Use High-Quality External Audio Gear
The NearStream AWM20T Wireless Microphone is perfect for this. It connects to your iPhone and delivers professional audio without wires getting in the way, so you can move freely around the scene.
FAQs: iPhone Recording Essentials
- How Do I Screen Record on iPhone Without Sound?
To record your screen without sound, simply disable the microphone before starting your screen recording. You can do this by pressing and holding the screen recording button in the Control Center, then turning off the microphone. Now you know how to screen record iPhone without capturing audio! - How Do I Record a Call on iPhone?
iPhones don’t have native call recording features, but you can use third-party apps like Rev Call Recorder or TapeACall to record your calls. Just make sure you’re following local laws and always ask for consent before recording. - Can I Record Audio Without Using the Voice Memos App?
Yes, there are other apps like GarageBand and Ferrite Recording Studio that allow you to record audio with greater control, editing options, and enhanced sound quality. These apps are perfect if you want more advanced features than what the Voice Memos app provides. - Can I Use an External Microphone for Screen Recording on iPhone?
Absolutely! To get the best sound quality while screen recording, consider using an external microphone like the NearStream AM25X. Simply connect the mic to your iPhone, then toggle the microphone on in the Control Center, and now you’ll know exactly how to record screen on iPhone with superior sound. - Can I Record Calls Legally on My iPhone?
Yes, you can record calls, but make sure you understand the legalities. In some places, you need to get consent from the other party before recording. Always check your local laws to ensure you’re following the correct procedure. - How Do You Screen Record on iPhone with Sound?
Wondering how to on screen record iPhone and include sound? It’s simple: just press and hold the screen recording button in the Control Center and make sure the microphone is toggled on. This will capture both your screen and your voice.


