


🎙️ Thinking of starting a podcast, but the setup sounds intimidating?
You're not alone. We conducted a survey among aspiring podcasters and found that over 72% of beginners feel overwhelmed by technical decisions. Below are the most common struggles—plus how we built our PodKit bundles to eliminate them
Common Podcast Setup Problems (and How to Solve Them)
❌ “I’m not a camera expert. What if I mess up the setup?”
Most actual users are not professional videographers—they’re marketers, coaches, founders, or even solo creators. The fear of choosing the wrong cable, mic, or camera is real.
✅ Solution: PodKit bundles are pre-configured with plug-and-play gear and step-by-step guides, so anyone—even without technical background—can go live confidently.
❌ “Too many gear options. I don’t know what to buy.”
XLR vs USB mic? DSLR vs webcam? Audio mixer vs audio interface?
✅ Solution: We’ve already tested and combined the most compatible camera + mic + mixer setups for solo, duo, and group use cases. No guesswork—just pick a configuration that matches your team size.
❌ “It’s too hard to connect everything.”
Cables. Tripods. Audio routing. It’s easy to miss a piece—or plug into the wrong port.
✅ Solution: All our bundles come with complete accessories (yes, including cables and tripods) and clear diagrams so setup is seamless.
❌ “Will my gear work together?”
Mismatched mic ports or incompatible mixers often lead to audio failure before you even hit "record."
✅ Solution: PodKit kits use tested compatibility across all devices. USB/XLR mics match mixers, and our camera setups use unified HDMI or USB for guaranteed interoperability.
❌ “I’m not good with software like OBS.”
You want to stream or record, but tools like OBS or audio interfaces seem intimidating.
✅ Solution: We include preloaded configuration files, platform-specific tutorials, and gear that supports one-click live streaming, so you can focus on your voice—not the software.
Why We Created PodKit: Turning Frustration into Focus
At NearStream, we noticed a pattern: most people launching podcasts aren’t technical experts — they’re coaches, marketers, founders, and creatives who care about content, not cabling.
That’s exactly why we created PodKit. Our mission is simple: eliminate the guesswork and turn any space — whether it’s a spare office or a studio corner — into a reliable, professional-grade recording setup.
We designed each PodKit bundle around real-world scenarios: solo creators, dual interviews, and team conversations. Everything you need — camera, mic, mixer, boom arm, stand, and cables — comes in one pre-configured package, tested for plug-and-play reliability.
No steep learning curve. No endless troubleshooting. 👉 Just crystal-clear video, pro-level audio, and the freedom to focus on what really matters: your voice.
Explore Our 1P/2P/4P Podcast Equipment Bundles-Clear and Simple
Whether you’re a solo creator, interviewing guests, or running a full team show, we’ve built six streamlined PodKit kits to meet your needs. Each bundle combines carefully matched video and audio gear, so you don’t have to worry about compatibility or missing components.
To simplify your selection, here’s a quick look at the core components featured across all six setups. These tools have been chosen for their reliability, ease of integration, and performance in podcast recording and live streaming environments.
🔧 All kits include pre-tested configurations for fast setup, covering:
| Product | Description |
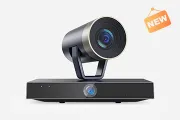
| VM20 4K Camera | Delivers stunning 4K clarity with powerful 40X hybrid zoom and stable wired connections (HDMI/USB/RJ45) for professional-grade streaming and recording. |
| AM25X Condenser Mic | Professional-grade audio with supercardioid capsule. Dual USB/XLR, AI noise reduction, one-tap mute, and real-time monitoring for flexible use in both digital and studio setups. |
| ST20 Boom Arm | Adjustable, sturdy arm for flexible mic placement and a clean desk setup. |
| AMIX40U Audio Mixer | All-in-one mixer with dual XLR/6.35mm inputs, real-time monitoring, 48V phantom power, and multi-device support via USB, AUX, and OTG. Ideal for portable recording and livestreaming. |
| XLR Cables | Professional-grade balanced cables for clean, interference-free audio connections. |
| Camera Stand | Solid, adjustable stand to ensure optimal framing and camera stability during sessions. |
🧩 Explore below to find the right kit for your setup:
- 1P = solo creator
- 2P = host + guest
- 4P = full panel setup
📝 Each configuration is plug-and-play, scalable, and optimized for high-quality podcast production.
📍All kits are fully compatible with OBS, Zoom, Riverside.fm, Audacity, and other popular software.
🛒 Looking for a full guide to your first recording? Scroll down for a step-by-step setup walkthrough.
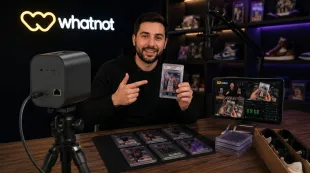
🎥 + 🎙 PodKit 1P Kit( Required Equipment)
🎥Video Solo (1P)
Perfect for solo creators, coaches, or vloggers who want a professional 4K setup in one box. Easy to assemble, plug-and-play ready — no tech experience needed.
🎙️Audio Solo (1P)
A no-frills, studio-quality audio kit for solo podcasters. Includes our noise-canceling mic and intuitive mixer — perfect for narration, teaching, or audio-only episodes.

| Product | Video Solo | Audio Solo |
| VM20 | 1 | – |
| AM25X | 1 | 1 |
| ST20 Boom Arm | 1 | 1 |
| AMIX40U | 1 | 1 |
| XLR Cable | 1 | 1 |
| Camera Stand / Tripod | 1 (Stand) | – |
| Price (USD) | $674.94 | $344.96 |
 |  |
 |  |
Steps:
- Software Installation:
- Download NearSync for device management and firmware updates: Download NearSync
- Install OBS or other streaming software on your computer.
- Hardware Installation:
- Mount the VM20 camera on a stand positioned at eye level in front of you.
- Place the AM25X microphone on the ST20 boom arm stand, positioned to capture your voice clearly. Connect the microphone to the AMIX40U audio mixer’s IN1 input via an XLR line.
- Connect the AMIX40U to your computer via a USB cable.
- Starting the Podcast:
- Open NearSync, update firmware, and configure device settings.
- In OBS, add two video capture sources, selecting "VM20" with presets set to "High."
- Add an audio input source, selecting "AMIX40U" as the device.
- Start streaming or recording as needed.
🎥 + 🎙 PodKit 2P Kit( Required Equipment)
🎥Video Duo (2P)
Ideal for host-guest interviews or two-person team recordings. Dual 4K camera setup ensures both angles stay sharp and engaging. Great for podcasts, testimonials, or training content.
🎙 Audio Duo (2P)
All two speakers need to sound clear, balanced, and professional. A reliable option for co-hosts, interviews, or client sessions with minimal setup time.

| Product | Video Duo | Audio Duo |
| VM20 | 2 | – |
| AM25X | 2 | 2 |
| ST20 Boom Arm | 2 | 2 |
| AMIX40U | 1 | 1 |
| XLR Cable | 1 | 1 |
| Camera Tripod Stand | 2 | – |
| Price (USD) | $1,209.90 | $509.94 |
 |  |
 |  |
Steps:
- Software Installation:
- Download NearSync for device management and firmware updates.
- Install OBS or other streaming software on your streaming computer.
- Hardware Installation:
- Position one VM20 camera on each side to capture both podcasters’ faces. Connect each camera to the computer via USB cables.
- Using the remote control, set each VM20 camera to "Device1" and "Device2."
- Position the AM25X microphones on ST20 stands and connect them to the AMIX40U’s IN1 and IN2 ports.
- Connect the AMIX40U to the computer using a USB cable.
- Starting the Podcast:
- Open NearSync, update firmware, and adjust device settings.
- In OBS, add two video capture sources, selecting "VM20" with presets set to "High."
- Add an audio input source, selecting "AMIX40U" as the device.
- Start streaming or recording as needed.
🎥 + 🎙 PodKit 4P Kit
🎥 Video Quad (4P)
Designed for roundtables, panels, or multi-host podcasts. Four synchronized 4K camera feeds provide maximum flexibility for editing and live switching. Professional polish made simple.
🎙Audio Quad (4P)
Built for group podcasts or collaborative recording. Ensures clean, consistent audio from up to four sources — all managed through a single intuitive mixer.

| Product | Video Quad | Audio Quad |
| VM20 | 4 | – |
| AM25X | 4 | 4 |
| ST20 Boom Arm | 4 | 4 |
| AMIX40U | 2 | 2 |
| XLR Cable | 2 | 2 |
| Camera Tripod Stand | 4 | – |
| Price (USD) | $2,419.80 | $1,019.88 |
 |  |
 |  |
Steps:
- Software Installation:
- Download NearSync and install OBS on your computer.
- Hardware Installation:
- Position four VM20 cameras on stands to capture each participant’s face.
- Connect the cameras to an HDMI switcher, then connect the switcher to a CCD30 capture card linked to your computer.
- Using the remote control, set each VM20 camera to "Device1" and "Device2." Repeat this process if you have more devices.
- Mount the four microphones on stands, connect them to the IN1 and IN2 inputs of the two AMIX40U mixers using XLR cables, and organize the cables with Cable Clips. Use a 3.5mm AUX cable (included in audio mixer package) to link the two mixers, then connect the mixer to the computer via USB.
- Connect the mixers to your computer via USB.
- Starting the Podcast:
- Open NearSync to update firmware and preset settings.
- In OBS, add a video capture device, selecting "CCD30 Capture Card" as the device.
- Add an audio input source, selecting "AMIX40U."
- Start streaming or recording as needed.
🛠️ Device Usage Tips: Mastering the VM20 Camera
The key difference between the audio and video kits is the addition of the VM20 4K camera, which captures stunning visuals to match your high-quality sound. To unlock its full potential, understanding how to adjust settings for various recording environments is crucial—especially for podcasts with visual components like interviews, training videos, or live streams.
🎥 Below, you’ll find quick-start tips, feature highlights, and a full setup tutorial video to get you up and running with confidence.

🎛️ VM20 Camera Tips
🔹 1. Adjust via Remote Control
- Zoom & Framing: Control zoom, auto-framing, and privacy shutter remotely.
- Presets: Save up to 3 custom framing modes and switch instantly.
- Image Modes: Select from Bright, Normal, or Low-Light depending on your studio lighting.
🔹 2. Configure via NearSync (Browser-Based Setup)
- Wired Setup Required:
- Use an RJ45 Ethernet cable to connect the camera to your router.
- Connect the VM20 to your PC via USB.
- Detect IP & Connect:
- Open the NearSync app to auto-detect the VM20's IP (default:
192.168.0.86) - Click “Auto Obtain” → “Refresh” → begin device configuration.
- Open the NearSync app to auto-detect the VM20's IP (default:
- Core Tabs:
- Device Settings – Rename and identify cameras
- Video Settings – Adjust resolution, frame rate, image tone
- Network Settings – Ensure connection to OBS or YouTube via RTSP
🔹 3. Connect to OBS for Live Streaming
- Once network settings are complete, copy the RTSP stream URL and paste it into OBS as a media source.
- Make sure firewall permissions are enabled for smooth transmission.
📺 Watch the Full Walkthrough Video:

🎙️ How to Use OBS for Podcast Recording (1P / 2P / 4P Setup Guide)
Whether you're running a solo podcast, co-hosting with a guest, or managing a four-person discussion, OBS Studio offers a flexible and professional-grade solution for recording and live streaming your content.
👥 Setup Tips for Different Podcast Sizes
| Setup Type | Camera Input | Audio Input | OBS Layout Suggestion |
| 1P (Solo) | 1x VM20 | 1x AM25X / Mixer | Full-screen or Picture-in-Picture (for slides/demo) |
| 2P (Duo) | 2x VM20 | 2x Mics via Mixer | Side-by-side or split screen layout |
| 4P (Panel) | 4x VM20 | 4x Mics via Mixer | 2x2 grid or speaker-focus view with cut transitions |
Here’s a simplified guide to get you started:
1P Podcasting
- Open OBS on your computer.
- Add video and audio sources:
Go to Sources → Add → Video Capture Device → Select VM20 → Set the preset to High.

Go to Sources → Add → Audio Input Capture → Select AMIX40U as the audio source (since AM25X is connected through AMIX40U).

- Set up scenes and transitions:
- Create different scenes for intro, main content, and closing segments.
Set up transitions between scenes for a more polished broadcast.

- Adjust audio levels using the AMIX40U mixer:
- Use the gain knob on the AMIX40U to control microphone sensitivity.
- Adjust output levels using the AMIX40U's volume knobs.
- Start streaming or recording:
- Click Start Streaming or Start Recording in OBS.
Monitor audio and video levels throughout the broadcast.

2P Podcasting
- Open OBS on your computer.
- Add video and audio sources:
- Go to Sources → Add → Video Capture Device → Select VM20 (set one camera as "Device 1" and the other as "Device 2").
- Go to Sources → Add → Audio Input Capture → Select AMIX40U as the audio source (both AM25X microphones are connected through AMIX40U).
- Set up scenes and transitions:
- Create different scenes for each podcaster’s camera feed.
- Add a two-person split-screen view for interactive moments.
- Set up smooth transitions between cameras.
- Adjust audio balance and levels using the AMIX40U mixer:
- Adjust gain levels separately for each microphone input.
- Monitor the audio mix through headphones connected to the AMIX40U.
- Start streaming or recording:
- Click Start Streaming or Start Recording in OBS.
- Monitor video and audio levels throughout the session.
4P Podcasting
- Open OBS on your computer.
- Add video and audio sources:
- Go to Sources → Add → Video Capture Device → Select CCD30 Capture Card as the video source (since all VM20 cameras are routed through the HDMI switcher into the capture card). (set the cameras as "Device 1", "Device 2", "Device 3", "Device 4").
- Go to Sources → Add → Audio Input Capture → Select AMIX40U as the audio source (both mixers are connected through AUX).
- Set up scenes and transitions:
- Create separate scenes for different camera angles.
- Include a multi-camera view for a dynamic discussion layout.
- Set up transitions between speakers and wide-angle shots.
- Adjust audio and camera angles:
- Use the AMIX40U mixers to control audio balance and levels for all four microphones.
- Adjust each camera angle using the HDMI switcher’s remote control.
- Start streaming or recording:
- Click Start Streaming or Start Recording in OBS.
- Monitor audio levels using the AMIX40U and make adjustments as needed.
💡 Pro Tip:
🔁Use OBS Scene Presets to switch camera angles or layouts mid-show with hotkeys. This makes multi-person podcasts look polished without live editing stress.
🔁Recording with OBS isn't just about technical setup—it’s about consistency and clarity. Once your configuration is tested, save your OBS Profile and Scene Collection to reuse every episode.
FAQ-Fixing Audio & Video Issues in Podcast Recording
1.Audio Quality:
- Can be caused by faulty cables, loose connectors, Bluetooth interference, or overloaded audio levels.
- Solution: Ensure cables are secure, reduce or eliminate Bluetooth devices during recording, and lower microphone volume if clipping is occurring.
- Often due to the microphone being too far from the speaker or poor microphone technique.
- Solution: Position the microphone closer (6-10 inches) and ensure the speaker is speaking directly into it, not across the top.
- Can be distracting and difficult to remove in post-production.
- Solution: Record in a quiet space with minimal echo, and consider acoustic treatment options like foam panels or carpets.
Echo or reverb:
- Occurs when sound waves bounce off hard surfaces.
- Solution: Record in a room with soft surfaces, or utilize a "pillow fort" setup with pillows to absorb sound reflections.
Not using headphones:
- Makes it difficult to monitor audio quality and can lead to poor recording.
- Solution: Use wired headphones to avoid interference and monitor your levels while recording.
Poor lighting:
- Especially important for video podcasts, can make your content look unprofessional.
- Solution: Use natural light from a window, or consider lamps and ring lights.
2.Technical Issues:
- Glitches, dropouts, or sync problems can disrupt the recording process.
- Solution: Adjust buffer size, close unnecessary programs, upgrade hardware if needed, and ensure a stable wired internet connection.
Incorrect microphone settings:
- Can result in poor audio quality.
- Solution: Consult the microphone's manual to identify the optimal settings (e.g., cardioid mode for single-person recordings).
Poor camera quality:
- For video podcasts, low-quality webcams can make your content look unprofessional.
- Solution: Invest in a dedicated camera or use a high-quality smartphone.
Not using a wired connection:
- Wi-Fi can be unreliable for remote recordings.
- Solution: Use an Ethernet cable for a more stable connection.
Not using a quality microphone:
- A cheap microphone can introduce noise and distortion.
- Solution: Consider investing in a quality dynamic microphone for spoken word recording.