


Instagram Live is a real-time video streaming feature on the Instagram app that allows users to broadcast live to their followers. Launched in 2016 as part of Instagram Stories, IG Live has since evolved into a powerful tool for creators, brands, and individuals to engage with audiences in a more authentic and interactive way.
When you go live, your followers receive a notification, and your video appears at the front of the Stories bar. Viewers can leave comments, react with emojis, ask questions, and even be invited to join the broadcast. Live videos can be saved and reposted to your IG feed or Story, extending their lifespan beyond the moment.
Unlike pre-recorded content, Instagram Live creates a sense of immediacy and real-time interaction. This makes it ideal for Q&A sessions, product launches, behind-the-scenes tours, and spontaneous check-ins with your community.
How to Go Live on Instagram: Step-by-Step Guide
Going live on Instagram is simple, but optimizing your setup can make a huge difference in viewer retention and engagement. Here’s how to do it on your phone:
Step 1: Open the Instagram App
Tap the Instagram icon on your iOS or Android device and log in to your account.
Step 2: Swipe Left to Access the Camera
From the home screen, swipe left or tap the "+" icon, then select “Live” from the options at the bottom.
Step 3: Set Up Your Stream
Add a title to let viewers know what your live is about. You can also choose to schedule it or add a fundraiser.
Step 4: Check Your Internet Connection
A strong Wi-Fi connection is crucial for clear and uninterrupted streaming.
Step 5: Tap the “Live” Button to Start Broadcasting
Once you’re ready, tap “Live” and you’ll go live instantly to your followers.
Step 6: Interact in Real Time
You can see comments, wave at viewers, and use filters during the broadcast. You can also pin comments or turn them off.
Step 7: End and Save
Tap the “X” in the top corner to end the stream. You can save the video to your camera roll or repost it as an IG Story or Reel.

How to Go Live with a Guest or Co-Host on IG Live
Instagram Live allows you to invite up to three other people to join your stream, turning your solo session into a multi-host conversation. This is especially useful for interviews, panel discussions, or collaborative Q&As.
Here’s how to do it:
Step 1: Start Your IG Live Normally
Follow the standard steps to begin a live stream.
Step 2: Tap the “👤+” Icon
Once live, you’ll see an icon with two faces or a “+” button. Tap it to view a list of users requesting to join or invite a specific user.
Step 3: Select Your Guest
Choose a user to invite—they’ll get a notification and can join instantly once approved.
Step 4: Adjust Layout
IG Live will automatically adjust the screen layout to accommodate multiple participants (split-screen or grid, depending on the number of users).
Step 5: Manage Participants
You can remove a guest at any time or switch them out with someone else. Up to four people can be live together.
This feature turns IG Live into a powerful collaboration platform and helps you reach new audiences via your co-host’s followers as well.
According to Cropink's report, the interaction rate of Instagram Live is six times that of ordinary video posts. Viewers can more easily like, comment, give rewards and participate in real-time interactive features such as Q&A. Moreover, 55% of Gen Z users watch Instagram Live at least once a week, and most of the live content comes from categories such as entertainment, education, and brand sharing.
(source: Cropink, How Live Streaming is Changing Engagement)
IG Live Features You Should Know
Instagram Live isn’t just about broadcasting—it’s about engagement. Over the years, Instagram has added several interactive features that can enhance your livestream and keep your audience involved in real time.
Key IG Live Features:
● Q&A Box: Viewers can submit questions in advance or during the stream. These appear in a separate tab and can be “pinned” to the screen so others can follow along. It’s perfect for structured AMAs or topic-driven discussions.
● Filters & AR Effects: Want to lighten the mood or brand your stream? Instagram offers built-in filters and face effects that can make your broadcast more visually interesting. Creators can also design their own AR filters for a custom look.
● Donations & Badges: In select regions, creators can earn money through IG Live by enabling “badges.” Viewers can purchase badges ($0.99–$4.99) during the stream to support the host.
● Live Shopping: For businesses, Live Shopping allows you to tag products directly in your stream. Viewers can click to purchase in real time—ideal for product launches or demos.
● Invite to Join: As discussed earlier, you can go live with up to three guests—expanding your reach and building community interaction.
● Comment Moderation: You can hide offensive comments, filter keywords, or appoint moderators to manage the chat.
● Save as Replay: After your livestream ends, you can post it to your IGTV or feed, allowing late viewers to catch up.

Tips to Make Your Instagram Live Look and Sound Professional
First impressions matter. A polished IG Live not only increases viewer retention but also signals professionalism—especially if you're using it for brand building, education, or product demos.
Visual Tips:
Use Natural Light or Soft LED Panels: Avoid harsh backlighting. If you're indoors, a ring light or LED panel can create flattering light without blowing out your highlights.
Stabilize Your Camera: Use a tripod or gimbal instead of handheld shooting to avoid shaky footage. This is critical for interviews or tutorials.
Set a Clean Background: A tidy room or branded backdrop eliminates distractions and reinforces your visual identity.
Audio Tips:
Avoid Built-in Mics: They often pick up room echo or ambient noise. Instead, use a clip-on wireless mic or a USB condenser mic.
Check for Echo & Noise: Test your environment before going live. Avoid rooms with hard surfaces and opt for soft furnishings to absorb sound.
Monitor Audio Levels: Apps like OBS or streaming tools can help ensure your audio doesn't clip or distort.
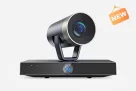
💡Pro Gear Tip: NearStream’s AM25X condenser microphone and wireless mic system are excellent solutions for clear voice capture. Combined with the VM20 4K streaming camera, they offer a powerful plug-and-play setup for creators who want professional-grade results directly from their phone or laptop.

What Equipment Do You Need for Better Instagram Live Streams?
A great Instagram Live doesn't require a TV studio—but the right gear can dramatically enhance how your content is perceived. Here's a basic list of hardware that improves quality without overwhelming beginners:
Equipment | Why It Matters | Example / Recommendation |
Smartphone Tripod | Prevents shaky footage and enables hands-free framing | UBeesize, Manfrotto Compact, JOBY GorillaPod |
Ring Light / LED Panel | Improves lighting consistency and skin tone | Neewer Ring Light, Elgato Key Light |
External Microphone | Captures clearer, more focused audio | NearStream AM25X, Rode Wireless Go, Shure MV88 |
Streaming Camera | Offers sharper image than built-in phone cam | NearStream VM20, OBSBOT Tiny, Logitech StreamCam |
Audio Mixer (Optional) | Controls multiple audio sources and levels | Focusrite Scarlett, Behringer Xenyx, NearStream AMIX40U |
How to Promote and Save Your IG Live After Streaming
The biggest mistake creators make is thinking the value of a livestream ends when you hit “End.” In reality, the replay of your IG Live can be just as impactful—if not more—than the original broadcast.
Post-Live Checklist:
Save to Feed or Story: After ending your stream, you’ll have the option to share it to your Instagram feed or 24-hour story.
Create a Highlight: Archive your most successful Live sessions into Highlights on your profile. This boosts long-term visibility.
Trim and Repost: Use tools like Instagram Reels or external video editors to repurpose your best live moments into short, shareable clips.
Promote on Other Platforms: Cross-post snippets to TikTok, YouTube Shorts, or Facebook Reels with captions and CTAs.
Email Newsletter & Blog: Summarize the key takeaways in an email or embed the video into your website/blog to reach your non-social audience.
Common Mistakes to Avoid When Going Live on Instagram
No Preparation. Going live without a topic, outline, or goal often leads to rambling and viewer drop-off.
Poor Lighting & Audio. If viewers can’t see or hear you clearly, they’ll exit quickly. Test your gear and environment beforehand.
Ignoring Comments. Failing to acknowledge audience input breaks the sense of interaction.
Bad Framing or Shaky Camera. Live video is visual. A stable shot and flattering angle make you look professional and trustworthy.
Overusing Filters. A little fun is great, but heavy AR filters can distract and reduce authenticity.
IG Live vs. Other Livestream Platforms: Which One Is Right for You?
Platform | Strengths | Limitations |
IG Live | Mobile-native, casual, strong engagement | Shorter shelf life, limited desktop tools |
YouTube Live | High-quality streaming, monetization | Slower growth for small creators |
TikTok LIVE | Fast virality, younger audience | No external streaming software support |
Facebook Live | Older user base, wide integration | Declining usage among Gen Z |
🌟 Choose IG Live if your content is:
Spontaneous, lifestyle-focused, or visual-heavy
Targeting millennials and Gen Z
Best consumed on mobile
FAQs:
Q: Can I go live on Instagram from a desktop?
A: Not natively. You’ll need third-party tools like OBS + stream key access (for advanced users).
Q: How long can an IG Live last?
A: Up to 4 hours per session.
Q: Does Instagram notify followers when I go live?
A: Yes, followers get a notification and see your live avatar at the top of their Stories.
Q: Can I schedule a Live in advance?
A: Yes. Use the “Schedule” option before going live and promote the event with countdown stickers.
Q: How can I monetize my IG Live?
A: Enable “Badges” (available in select countries) and consider product placement or affiliate links.