


Did you know videos get 1,200% more shares than text and images? This stat explains why many creators prioritize video interviews when they set up interviews. In fact, a report says video interviews are now the most popular podcast style and are resonating with audiences more than ever. But capturing professional looking interviews takes more than hitting records. Every detail from camera placement to lighting angles impacts production quality.
A 3 point lighting setup with key lights at 45-degree angles adds depth and polish, while thoughtful equipment choices elevate your content. Whether you’re going for a 2 camera setup for editing flexibility or a 2 person lighting setup that flatters both guests, the right setup interview matters. This article must have tools and pro techniques for any budget to help you master the ultimate video interview setup and level up your content game.
Planning the Right Setup for Your Interview Style
Choosing the right video interview setup starts with understanding your format and surroundings. The gear and layout you’ll need vary depending on whether you’re filming solo or with a guest, indoors or outside, or creating content for different platforms like podcasts or YouTube. Let’s break it down.
1-Person Expert Interviews vs 2-Person Conversational Formats
If you’re doing a solo expert interview the focus is entirely on one person. In this case the person is usually framed slightly off center, speaking towards an off camera interviewer. This style feels natural and requires minimal equipment but the camera angle and framing must be spot on to keep it engaging.
A 2 person interview setup however is more visually dynamic. You’ll want to show both people in the frame, positioned close together, think shoulder to shoulder if standing or knee to knee if seated. It might feel a little tight in person but on camera. This format builds intimacy and energy especially when paired with a 2 camera interview setup.
Indoor vs Outdoor Considerations
Filming indoors gives you control. You can manage lighting, sound, and even temperature. But echo can be a problem, especially in empty rooms. You can hang sound-dampening materials like acoustic panels, rugs, or even heavy curtains to soften the audio.
The Outdoors gives you a whole different vibe. Natural light and scenic backgrounds can make your content pop. But there are challenges too, unpredictable weather, noise from traffic or passersby and lighting that changes fast. If you’re set on filming outside, scout your location ahead and aim for the golden hours—early morning or late afternoon—when the sunlight is soft and flattering. And always have a Plan B location in case things go sideways.
Multi-Purpose Setups for Podcasts, YouTube and Brand Content
If you’re creating content for multiple platforms a flexible setup is key. A 3 camera layout works wonders: one wide shot of everyone and two close ups for individual speakers. This gives you editing freedom. It’s perfect for podcasts that double as YouTube videos or clips for social media.
Add a video switcher like the Blackmagic ATEM Mini Pro to take things up a notch. It lets you switch between live angles while recording and streaming in real time. Pair that with an audio interface that supports multiple mics and you’re set for professional grade video and audio across any channel.
Video Interview Tools You’ll Need

Choosing the right equipment forms the foundation of any successful video interview setup. Your chosen video interview tools will directly impact your production quality and how professional your final content looks to your audience.
Cameras: DSLR/Mirrorless vs Webcam vs Streaming Camera
Camera choice affects interview visual quality. DSLR and mirrorless cameras offer superior image quality, depth-of-field control, interchangeable lenses and excellent low light performance. These cameras cost around $600 but require accessories like capture cards to function as webcams.
Webcams are the go-to for convenience and are ideal for those just getting started. High end models like the Logitech Brio offer decent 4K output but still fall short of DSLR style depth. Consider a dedicated streaming camera if you want plug-and-play simplicity with enhanced quality.
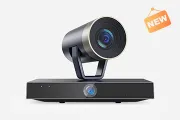
The NearStream VM20 4K Wired Streaming Camera is a balanced option. It’s perfect for creators who want better results than webcams without diving into the complexity of DSLR setups. You’ll get clear, vibrant footage with minimal setup, perfect for interview content.
Audio: Lavalier vs Dynamic vs Condenser Mic
In video interviews, audio quality matters more than visuals. Viewers may tolerate mediocre video but will quickly tune out poor sound. Here are your main microphone options:
1. Lavalier Microphones: Clip-on lav mics are perfect for interviewees who move while speaking. Their unobtrusive design ensures consistent audio levels. For wireless convenience, check out the AWM20T Wireless Microphone.
2. Dynamic Microphones: Dynamic mics shine if you’re recording in a noisy room or uncontrolled setting. They focus on your voice while ignoring background distractions. Remember, they must be close to your mouth to work well.
3. Condenser Microphones: These mics offer high sensitivity and rich detail, perfect for quiet, controlled spaces. The AM15X and AM20X deliver professional-grade clarity with USB and XLR connectivity. It is ideal for both beginners and advanced creators.
Audio Mixer for Multi-Mic Balancing
If your interviews involve more than one person an audio mixer is a must-have. It lets you manage separate audio levels for each mic so one voice doesn’t drown out the other. Mixers also let you monitor audio in real time so you can catch and fix problems as they happen instead of discovering them in post production.
The NearStream mixer is a solid entry level option for creators who want control without needing a sound engineer’s expertise. It has simple, intuitive controls, real time monitoring and multiple mic inputs. It is perfect for 2 person interviews where clear, balanced audio is key.
Lighting Setup for 2-Person Interview

Lighting design forms the foundation of professional looking video interviews especially when capturing 2 people on camera. Unlike single subject setups, lighting multiple subjects requires more thought.
Use 3-Point Lighting for Each Person.
The classic 3 point lighting method works for 2 person interviews as long as you adjust it. Each person gets a key light (main source), a fill light (to soften shadows) and a backlight (to separate them from the background). But with 2 people you don’t need 6 lights.
An innovative approach is called cross-key lighting. You can use one key light for each person, but position them so that each light also acts as the fill for the other person. This way, you get even lighting with fewer lights. Position each light just behind one subject, aimed diagonally across to the other person. This creates depth without looking unnatural and balanced.
To finish the setup, you can add one soft fill light in front of both subjects to gently brighten up any remaining shadows. It’s simple, efficient, and works great.
Ring Lights vs Softboxes: What to Use in Small Spaces

Deciding between ring lights and softboxes can make a big difference if you’re working in a small space. Ring lights are compact and produce even, direct light with a circular reflection in the eyes. They’re great for headshots but not ideal for two people or capturing more depth.
Softboxes are larger but more versatile. They diffuse light across a broader area, softening shadows and making them look more flattering on camera. Softboxes tend to deliver better, more natural results for interviews, especially with two people, but they take up a bit more space.
Managing Natural Light with Modifiers
Natural light can be a beautiful addition to your setup, but only if you can control it. If you’re shooting indoors near windows, you can use daylight as your main source and fill in the gaps with artificial lights.
This is where modifiers come in. Reflectors help bounce light onto your subject, softening shadows and creating a more balanced, even exposure. If you have too much light, flags (or even blackout cloths) can block it off and prevent lens flares. For sunny windows, diffusion material like sheer curtains or translucent umbrellas can soften and spread that light across both interviewees.
Lastly, stick to one color temperature across all your lights, either daylight (around 5600K) or tungsten (around 3200K). Mixing them can make skin tones look weird and mess with your white balance. Consistency is essential for achieving a professional appearance.
Two-Camera Interview Setup

Going from a single camera to a two camera setup instantly elevates your interview production. It adds visual interest, gives you more editing flexibility and helps keep your audience engaged especially during longer conversations.
Camera 1 – Wide Shot of Both Subjects
The first camera, often called your “A-cam,” should cover a wide shot that includes both people in the frame. Think of this as your anchor angle. The shot sets the scene and gives the viewer a sense of place and perspective.
Set this camera up straight on, about 6 to 8 feet away and center it between your subjects. To add some visual depth, have your interviewees angle towards each other instead of sitting face-to-face or side-by-side. This subtle positioning helps both faces stay in frame and gives the scene a more natural look.
Camera 2 – Alternating Close-Up (Host/Guest)
The second camera is where the magic of emotional storytelling happens. This camera does close-ups, capturing the subtle expressions, reactions, and emotional cues that give your interview life.
Position it just over one person’s shoulder to zoom in on the other person’s face. For instance, position it behind the host to film the guest, and do the opposite if needed. The subject being filmed shouldn’t look directly into the lens. They should keep their eyes on the interviewer. To make the eyeline feel natural, have the interviewer sit just to the side of the camera lens (but not in the shot).
This setup creates those moments of connection and authenticity during the conversation.
Switching Between Angles Using OBS or a Video Switcher
You’ll want to switch between your two camera angles during the interview to tie it all together. This keeps the video dynamic and engaging.
If you’re on a budget, OBS Studio (Open Broadcaster Software) is a free, powerful tool that lets you switch between camera sources with hotkeys – like pressing “1” for the wide shot and “2” for the close-up. You can even set up scenes in advance to make transitions smoother.
For more advanced users or those who want hardware control, devices like the Blackmagic ATEM Mini offer real-time switching with physical buttons. These switchers can handle multiple HDMI inputs, add overlays and even picture-in-picture effects. It’s great for live commentary or Q&A style formats.
Regardless of your choice, make sure your cameras are color matched. Use a color checker passport or white balance card to keep skin tones consistent, especially if you use different camera brands or models. Consistency is key to looking professional.
Budgeting for Your Interview Setup: What to Expect at Different Price Points

You don’t need a studio budget to create a great interview setup. With a clear idea of what you want and smart budgeting, you can get a professional look at any investment level. Whether you’re a solo content creator or building a branded YouTube series, here’s what to expect at each price point.
Basic Setup ($100–$300) — For Solo Creators or Beginners
Starting out doesn’t mean settling for low quality. With a budget of $100–$300, you can create a clean and credible interview setup with affordable gear and easy to use software.
Webcam or Entry-Level Streaming Cam
Your video quality starts with the camera. Budget options like the Logitech C920 or NearStream's 4K Streaming Camera VM20 are great and plug-and-play. The VM20 delivers 4K and can be used as a webcam – perfect for those who want to maximize their budget.
Lavalier Mic or Budget USB Mic
Audio is more important than video in viewer perception. Lavalier mics like the Rode SmartLav+ are great for mobile use, but for computer setups, consider the AM15X USB Microphone, which is explicitly designed for streaming and podcasting. It’s affordable, sleek and delivers clear sound without a mixer.
Natural Lighting or Basic Ring Light
Lighting can elevate the most basic setup. Use natural light by facing a window, or invest in a simple ring light to ensure balanced exposure during interviews. This lighting method pairs beautifully with any webcam or entry-level cam.
Free Software Like OBS or Streamlabs
OBS and Streamlabs are both free, feature-rich platforms ideal for recording and live streaming. They support webcam overlays and multi-scene layouts and are beginner-friendly, making them must-haves for any starter setup.
Recommended Bundle: Consider checking out NearStream’s Podcasting Kit or Streaming Kit for affordable, all-in-one solutions at this tier.
Mid-Tier Setup ($400–$800) — For 1-on-1 Brand Interviews or YouTube Series
Stepping into the mid-tier range allows you to boost production quality significantly—ideal for creators ready to build branded content or produce regular interviews.
NearStream VM20 or DSLR with Clean HDMI
Enhance your video production with the NearStream VM20, the 4K camera that delivers DSLR-level quality. It's a professional solution without the DSLR hassle with 10x optical zoom, multiple connection options (HDMI, USB, RJ45), and excellent low-light performance. Explore the VM33 All-in-One Camera for even more versatility, offering wireless 10x zoom capabilities.
AM15X or AM20X Mic with Optional Boom Arm
Take audio to the next level with dynamic and condenser microphones. The AM15X and AM20X provide both USB and XLR output options, perfect for different setups. Mount them on a boom arm for professional positioning and enhanced clarity.
Alternatively, go wireless with the AWM20T Wireless Microphone for a clutter-free experience and greater flexibility during shoots.
Two Softboxes or 3-Point Lighting Kit
Lighting makes a dramatic impact at this level. Invest in two softboxes or a 3-point lighting kit to create depth and separate your subject from the background. A standard setup includes a key light, fill light, and backlight, providing a cinematic glow ideal for professional interviews.
NearStream Audio Mixer for Multi-Mic Control
Managing multiple speakers? The NearStream Portable Audio Mixer (AMIX40U) offers individual mic gain control, real-time monitoring, and XLR/USB support. It’s essential for balancing host and guest audio levels, especially in dynamic interview environments.
Tripods and Basic Acoustic Treatment
Sturdy tripods stabilize your shot while acoustic foam or wall treatments reduce echo and improve sound quality. Mounting mics on arms and placing soft panels behind or beside the subject ensures crisp, distraction-free audio.
Bonus Tip: For gaming interviews or interactive livestreams, consider the Game Streaming Kit from NearStream, which includes high-performance gear tailored for real-time content creation.
Pro Setup ($1,000+) — For Two-Person Interviews or Ongoing Branded Shows
If you plan to launch a professional-grade interview series or a branded show, investing over $1,000 is not just a splurge; it’s necessary for broadcast-quality production. This tier brings you closer to studio-level content and adds serious credibility to your visual brand.
Dual-Camera Setup (DSLR or Mirrorless)
A dual-camera setup is the gold standard for achieving polished, cinematic visuals. Use a Canon C70 or a similar high-end model as your main (A) camera, pairing it with a Canon EOS R5 or similar mirrorless unit for the secondary (B) angle. This setup ensures you capture both head-on and dynamic over-the-shoulder shots.
If you’re looking for a plug-and-play camera solution that doubles as a webcam and streaming device, check out this DSLR-quality optical streaming camera or upgrade to a 10X Optical Zoom Wireless Streaming Camera for flexible angles and movement.
Multi-Mic + Mixer Solution
Audio quality can make or break your interview. That’s why a dual-microphone setup is ideal, like a lavalier paired with a shotgun or dynamic mic. Route your mics through a pro mixer like the RodeCaster Duo or a versatile Portable Audio Mixer for optimal control.
Need reliable mic options? Grab a USB & XLR Condenser Microphone or a USB microphone for streaming and podcasting to capture crisp, studio-level sound.
High-End Lighting with Softboxes or Modifiers
Lighting defines the atmosphere and clarity of your content. Invest in strong lights like the Aputure 300d Mark II paired with a softbox for gentle facial lighting. Combine that with LED backlights like the Aputure 60d and you'll eliminate shadows while adding depth.
For more budget-conscious lighting kits, explore the Podcasting Kit or Streaming Kit.
Stream Deck or Switcher for Angle Changes
A Stream Deck or any programmable switcher is a smart way to boost efficiency. With the push of a button, you can cut between camera angles, cue sound effects, or adjust volume levels—all in real time. This is perfect for livestreams and time-sensitive interviews.
Studio Monitors and Proper Soundproofing
Don’t overlook audio monitoring. A setup like the Yamaha HS5 with a matching subwoofer ensures accurate sound editing. And for soundproofing? Rockwool acoustic panels, carpets, and blackout drapes go a long way to tame echoes. This creates a distraction-free audio space essential for professional productions.
Where to Save vs Where to Invest
A smart setup strikes the right balance between saving wisely and spending strategically. Here’s how to achieve that without sacrificing quality:
Save On: Lights, Stands, and Basic Tripods
Not every component needs to cost a fortune. Entry-level light stands, diffusers, and tripods often perform as well as high-end versions for stationary interviews. An affordable ring light can do the job in tight spaces, offering consistent facial illumination.
Modifiers like reflectors or fabric diffusers work the same whether they cost $20 or $200—feel free to cut costs here.
Invest In: Audio Clarity and Camera Quality
If you’re going to splurge, do it on audio and camera. Viewers will forgive slightly soft footage but won’t stick around for echoey or unclear sound. Consider dynamic or condenser mics for the best performance, and invest in 4K-capable cameras to create that signature “cinematic” look. You can even explore a 4K streaming camera or gear with advanced capture capabilities like this 4K60 USB 3.1 Capture Card for streaming DSLR or gaming footage.
Rent Gear (Camera/Switcher) If Producing Occasional or Pilot Content
Renting offers a smart way to get a feel for what suits you best. Sites like KitSplit or ShareGrid let you try top-tier equipment at a fraction of the cost. For example, renting a switcher or DSLR setup for a weekend shoot may cost under $100. It is ideal for pilot episodes or limited series. Once you’ve found your rhythm, you can invest confidently.
Additional Tips for a Seamless Production
Preparation constitutes the foundation of every successful video interview. Even with perfect equipment selection, overlooking production essentials can ruin your recording.
Test all tech 30 minutes before recording.
Technical failures represent the most common source of interview disasters. Establish a thorough pre-recording checklist and complete it at least 30 minutes before every interview session:
Test the specific software platform you'll use (Google Hangouts, Skype, etc.) with your camera and microphone settings configured
Verify your internet connection stability. Consider hardwiring your laptop instead of relying on WiFi to prevent connection issues.
Position your camera at proper eye level so the interviewer sees from your torso up (stacking books under your laptop often helps achieve ideal height)
Silence all notifications on both your computer and smartphone to prevent distracting interruptions
Record a test video to check your audio levels and camera framing.
Record backups for audio and video
Unfortunately, technology occasionally fails regardless of preparation. Creating redundant recordings provides essential insurance against lost content:
Connect an external audio recorder or interface like the Zoom PodTrak P4 or RODECaster Pro to create separate recordings for optimal protection. These devices capture clean audio independent of your computer's performance.
Implement software backup solutions in addition to dedicated hardware. Many video interview platforms offer cloud recording options, yet local recording through OBS provides additional security. Ideally, implement multiple backup methods simultaneously. Losing irreplaceable interview content due to technical issues can prove devastating.
Add branding and overlays during post-production
Professional-looking interviews typically include branded elements that elevate production value. Third-party applications or dedicated video editors offer extensive customization options.
Lower thirds (name/title graphics) add professional context for viewers. Experts generally recommend adding these elements during post-production rather than during live recording. Unless using sophisticated streaming setups, incorporating graphics during recording "bakes in" these elements permanently, limiting future editing flexibility.
Final Cut Pro and Adobe Premiere Pro provide extensive branding capabilities, allowing custom lower thirds, logo overlays, and branded intro/outro sequences that transform basic interviews into polished productions.
Conclusion
A successful video interview setup blends the right equipment with thoughtful preparation. Whether you're hosting a one-on-one or a two-person conversation, your setup should prioritize clear audio, proper lighting, and stable video quality. From budget-friendly options to high-end professional kits, there’s a solution for every creator and setting. Testing your gear, recording backups, and adding branding during post-production will take your interviews to the next level. Remember, it’s not just about the tools. It’s about the experience you create for your audience.
Ready to elevate your video interviews with seamless tools and expert setups?
Explore professional-grade solutions tailored for creators at Nearstream.