


You’ve just wrapped up an incredible interview. The guest was a dream, the insights were pure gold. You hit 'End Meeting,' wait for the file to convert, and your heart sinks. The audio is tinny, your guest's video froze for a crucial five seconds, and the whole thing sounds... well, like a Monday morning status call.
If this sounds familiar, you’re not alone. The podcasting world is exploding, but so are listener expectations. In a landscape where 73% of listeners will abandon an episode due to poor audio quality, "good enough" is no longer good enough. And with the meteoric rise of video—where(https://www.edisonresearch.com/the-podcast-consumer-2025/)—visuals are just as critical.
Here’s the hard truth: Zoom was built for meetings, not media. Its primary goal is to maintain a stable, real-time connection, which it achieves by compressing audio and video. That’s great for a business call, but it’s a quality killer for content creators.
But don’t worry, we’ve got your back. This guide will show you how to record a podcast on zoom and everything you need to know.
Part 1: Forging a Studio from a Conference Room: The Ultimate Zoom Podcast Guide
The Pre-Flight Checklist: Setting the Stage for Success
Great audio isn't magic; it's preparation. Before you even think about hitting that record button, you need to control your environment. Getting these four things right will solve 80% of your quality problems before they start.
Environment is Everything
Your microphone hears everything, including the room itself. Recording in a space with hard, reflective surfaces like wood floors and bare walls will create echo and reverb, making your audio sound distant and unprofessional.5 The fix? Choose a room with soft surfaces. Think carpets, curtains, couches, and bookshelves. These items absorb sound waves, giving you a cleaner, more direct vocal recording.6 A walk-in closet is a classic podcaster's trick for a reason!
The Wired Connection Imperative
Wi-Fi is the number one enemy of a stable remote recording. It’s prone to interference, drops, and fluctuations in speed, which translate directly into glitches, frozen video, and garbled audio in your final recording.5 The solution is simple: plug in. A wired Ethernet connection provides a stable, consistent pipeline for your data. As the host, this is non-negotiable. For your guests, strongly encourage them to do the same. It’s the single most effective way to prevent connection-related disasters.
Headphones are Mandatory
This is the golden rule of remote recording: every single participant must wear headphones. No exceptions. When someone isn't wearing headphones, their microphone picks up the audio coming from their speakers. This creates a nasty echo or feedback loop.6 Zoom tries to combat this with a feature called "echo cancellation," but it does so by aggressively muting one person's microphone when the other is talking (a process called "auto-ducking"). This completely destroys the natural flow of conversation, cutting off interjections and making your dialogue sound choppy and unnatural.5 Mandating headphones allows you to turn this feature off, preserving your conversational chemistry.
Guest Onboarding: Set Them Up for Success
Your recording is only as good as your weakest link. Don't assume your guests know the best practices. Send them a simple pre-interview checklist to ensure they’re ready to go. This positions you as a professional and saves you headaches later.9
Your checklist should include:
- Find a quiet room: Away from pets, children, and street noise.
- Use headphones: Even basic earbuds are better than nothing.
- Use a wired internet connection: If possible. If not, sit close to the Wi-Fi router.
- Close other applications: Free up computer resources and bandwidth.
- Use an external microphone: If they have one.
Unlocking Hidden Audio Quality: A Deep Dive into Zoom's Settings
Zoom’s default settings are your enemy. They are designed to filter, suppress, and compress your audio for clarity in a business meeting. As a podcaster, you want the exact opposite: rich, full, uncompressed audio. It’s time to dive into the settings and "hack" Zoom to work for you.
Step 1: Enable "Original Sound for Musicians"
This is the master switch. "Original Sound" tells Zoom to stop its aggressive audio processing and let the raw audio from your microphone pass through.
Here’s how to turn it on:
- Open the Zoom desktop app and click the Settings gear icon in the top-right corner.
- Go to the Audio tab.
- Under Audio Profile, select the option for Original sound for musicians.
This enables the feature, but you’re not done yet. This is the step everyone misses: In every single meeting you record, you must look to the top-left corner of the meeting window and click the button that says "Original sound for musicians: Off." This will toggle it to "On".7 You have to do this every single time.
Step 2: Configure Your Audio Profile for Podcasting
With Original Sound enabled, you now have a few more crucial options. Still in the Audio > Audio Profile settings, make these adjustments:
- Check "High-fidelity music mode": Don’t let the name fool you. This setting boosts the audio codec quality to a higher bitrate (up to 192kbps stereo), giving you a richer, more detailed recording. It’s essential for podcasting.
- Uncheck "Echo cancellation": You can only do this if everyone is wearing headphones, but it’s critical. This stops Zoom from "ducking" the audio and ruining your conversational flow.
- Check "Stereo audio": If you or your guests are using a stereo microphone, this will capture a more immersive soundscape. It’s a good idea to have it on by default.
- Set "Suppress background noise" to "Low": While Original Sound disables most processing, this setting provides a tiny safety net. The "Auto" setting can be too aggressive, so "Low" is the safest choice to cut out minor hums without affecting your voice.
Step 3: Record Separate Audio Tracks (The Most Important Setting)
This is a non-negotiable, game-changing setting for anyone serious about post-production. By default, Zoom mashes everyone’s audio into a single file. This makes editing a nightmare. If one person is too loud, you can't fix it without affecting everyone else.
Enabling separate tracks gives you an individual audio file for each participant.
- In the Zoom desktop app, go to Settings.
- Click the Recording tab.
- Check the box that says "Record a separate audio file for each participant."
Now, when you edit, you can adjust levels, apply noise reduction, and cut out coughs for each person independently. It’s the difference between an amateur and a professional-sounding podcast. The very fact that this powerful feature is buried in the settings, and not a default, front-and-center option, speaks volumes. It's a clear sign that you're using a tool for a purpose it wasn't designed for. A dedicated
zoom podcast recorder would prioritize this kind of creator-focused control.
From Grainy to Great: Maximizing Your Video Quality on Zoom
In today's podcasting landscape, your video is your brand's handshake. Grainy, low-resolution video makes your show look amateurish. Here’s how to make your Zoom video less of a liability.
- Enable HD: This is the first and easiest step. Go to Settings > Video and check the "HD" box. This tells Zoom you want to send and receive a higher quality video stream. Keep in mind that Zoom may still downgrade the quality if your internet connection is weak, but you should always have it enabled.8
- Record Locally, Not to the Cloud: When you hit record, Zoom gives you two options: "Record on this Computer" or "Record to the Cloud." Always choose "Record on this Computer." Local recordings are generally saved at a higher resolution (up to 720p or 1080p, depending on your plan) than cloud recordings, which are often compressed down to a paltry 640x360 resolution.8
- Choose Your Layout: Zoom records what you see. Before you hit record, decide if you want "Speaker View" (which automatically switches to whoever is talking) or "Gallery View" (the classic grid layout). For most interview podcasts, Gallery View is the safer bet, as it gives you constant footage of both you and your guest, offering more flexibility in post-production.18
A great video setup is the foundation of a successful video podcast. As you grow, you'll want to build out a more professional youtube podcast setup to truly stand out.
Part 2: Hitting the Zoom Ceiling: Why Workarounds Will Only Get You So Far
You’ve now learned how to push Zoom to its absolute limits. But even with every setting perfectly optimized, you will eventually hit a wall. This is because the fundamental architecture of Zoom is at odds with the needs of a content creator.
The Unstable Foundation: The Truth About "Local Recording"
This is the most critical concept to understand. When platforms like Nearstream talk about "local recording," they mean something completely different from what Zoom does. This difference is the root cause of nearly every quality issue you've experienced.
- Zoom's Method (Internet-Reliant): When you press "Record on this Computer" in Zoom, the software is capturing the audio and video stream after it has traveled across the internet. It takes the compressed, glitchy, and sometimes incomplete data it receives from your guest, and simply saves that compromised stream to your hard drive.19 The quality of your final file is therefore permanently chained to the weakest internet connection on the call.
- True Local Recording (Internet-Independent): Purpose-built platforms work differently. They record the audio and video directly from each person's microphone and camera, saving a pristine, uncompressed file on their individual computers before it ever touches the internet.6 The internet is only used for the live conversation; it has
zero impact on the final recording quality.
Think of it this way: recording on Zoom is like taking a screenshot of a glitchy, buffering video call. True local recording is like having the original, high-resolution video file sent to you from each person's camera. One is a flawed copy; the other is the perfect original.
The Quality Compromise in a Video-First World
This fundamental difference in recording technology leads to a hard ceiling on quality. With Zoom, you are always making a compromise.
You’re limited to compressed M4A audio files, which lack the depth and richness of uncompressed WAV files. Your video is often capped at a compressed 720p or 1080p, with variable frame rates that can make motion look choppy and unnatural.
In the past, maybe that was acceptable. But not anymore. With(https://www.edisonresearch.com/the-infinite-dial-2025/), your visual presentation is just as important as your audio. A blurry, unstable 720p video simply can't compete in a world of crisp 4K content. Sticking with Zoom's limitations means you're intentionally putting yourself at a disadvantage.
Part 3: The Modern Podcaster's Toolkit: Essential Gear for a Professional Sound and Look
While the right software is crucial, pairing it with the right zoom podcast equipment is what separates the hobbyists from the pros. Investing in a few key pieces of gear will elevate your quality, regardless of the platform you use.
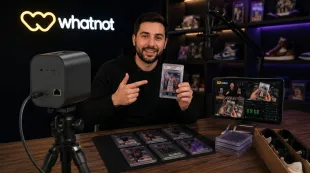
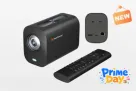
The All-in-One Solution: The Nearstream PodKit Kit
For creators who want to skip the guesswork and get straight to recording, Nearstream offers the PodKit Kit. It's a complete, modular "Lego-like" system designed for plug-and-play simplicity, ensuring you get professional results without the technical headaches.
The kits are available in different configurations to match your show's format :
- PodKit Solo: Perfect for the individual creator.
- PodKit Duo: The ideal setup for two-person interviews.
- PodKit Quad: A complete solution for podcasts with up to four hosts or guests.

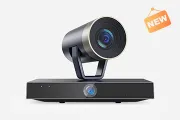
Each video podcasting kit comes bundled with professional-grade equipment to deliver crystal-clear audio and razor-sharp video :
- VM20 4K Cameras: These cameras provide crisp visuals and feature a 40x zoom, ensuring a high-quality video feed.
- AM25X Condenser Microphones: Offering both USB and XLR connectivity, these mics capture clear, noise-cancelled audio for that classic broadcast sound.
- ST20 Boom Arms: These give you flexible and stable microphone positioning.
- AMIX40U Audio Mixer: This 10-channel mixer gives you ultimate control over your sound, allowing you to remove background noise and add effects for a more dynamic live session.
The main benefit of a bundled solution like the PodKit Kit is that it eliminates compatibility issues and provides a straightforward path to achieving a professional-looking and sounding podcast from day one.
A solid visual foundation is key, especially for new creators. Learning how to start a youtube podcast for beginners can help you build an audience from day one. And when you're ready to grow, perfecting your youtube podcast setup is essential for long-term success.
Lighting for Impact: Look as Good as You Sound
Good lighting is the secret ingredient to professional-looking video. It separates you from your background, eliminates unflattering shadows, and makes you look more vibrant and engaging.
- The Power of Natural Light: The best light source is free. Simply face a window. The large, soft light will illuminate your face evenly and beautifully. Avoid having a window behind you, as this will turn you into a silhouette.
- The 3-Point Lighting Basics: In professional video, they use a three-point setup. For a podcaster, you can simplify this. You need one good Key Light. This is your main light source, placed in front of you and slightly to one side, angled down at your face. This creates a pleasant, dimensional look.
- Simple, Affordable Solutions: A fantastic starting point is a ring light or a small LED panel. A light like the Lume Cube Ring Light Mini provides soft, even light that wraps around your face, minimizing shadows. Place it behind your webcam, and you'll see an immediate, dramatic improvement in your video quality.
Conclusion: It's Time to Graduate from Zoom
You've learned how to push Zoom to its absolute limits, tweaking every setting and optimizing your environment. But you've also seen where those limits are—a ceiling defined by compressed files, unreliable internet connections, and a platform that was never meant for you, the creator.
Recording on Zoom is telling your audience your podcast is a side project. Recording with Nearstream shows them you're serious. It’s time to stop being a meeting host and start being a media creator.
Ready to leave the workarounds behind? Start recording studio-quality podcasts today with Nearstream.
Frequently Asked Questions (FAQ)
Q1: Can you really get good audio quality from a Zoom podcast?
A: You can significantly improve it by using the "Original Sound" settings and a good external microphone. However, it will always be compressed and limited by your internet connection, falling short of the quality from a dedicated recording platform.
Q2: Do I need a paid Zoom account to record a podcast?
A: The free plan limits group meetings to 40 minutes, which is often too short for an interview. A paid plan is necessary for longer recordings and to access cloud recording features.
Q3: What is the best way to record separate audio tracks on Zoom?
A: In your desktop app settings, go to the "Recording" tab and check the box for "Record a separate audio file for each participant." This only works when you select "Record on this Computer."
Q4: Does Zoom record video in HD?
A: You can enable "HD" in your video settings, but the actual output resolution (typically 720p, sometimes 1080p on paid plans) depends on network conditions and other factors. It will always be a compressed video file.
Q5: Why do my guests sound so much worse than me on my Zoom recording?
A: Their audio quality is determined by their microphone, their room acoustics, and their internet connection. Zoom captures the audio after it has been compressed and sent over their internet, which is why a poor connection on their end can ruin the recording.